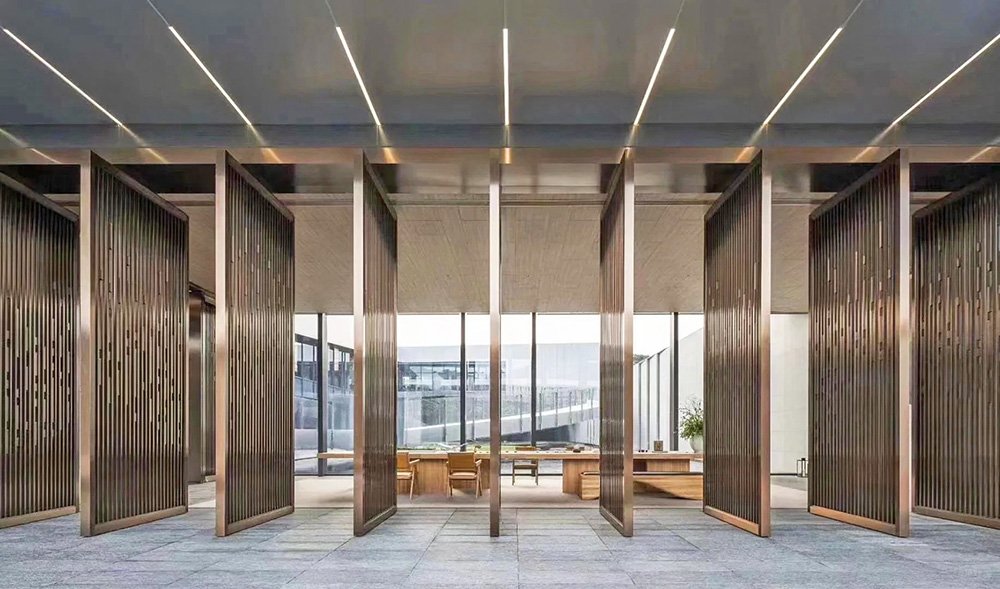
Deepening Solutions for Stainless Steel "Edge Trim" - Skirting & Tile Trim
Table of Contents
Installation Analysis of Stainless Steel Skirting Board
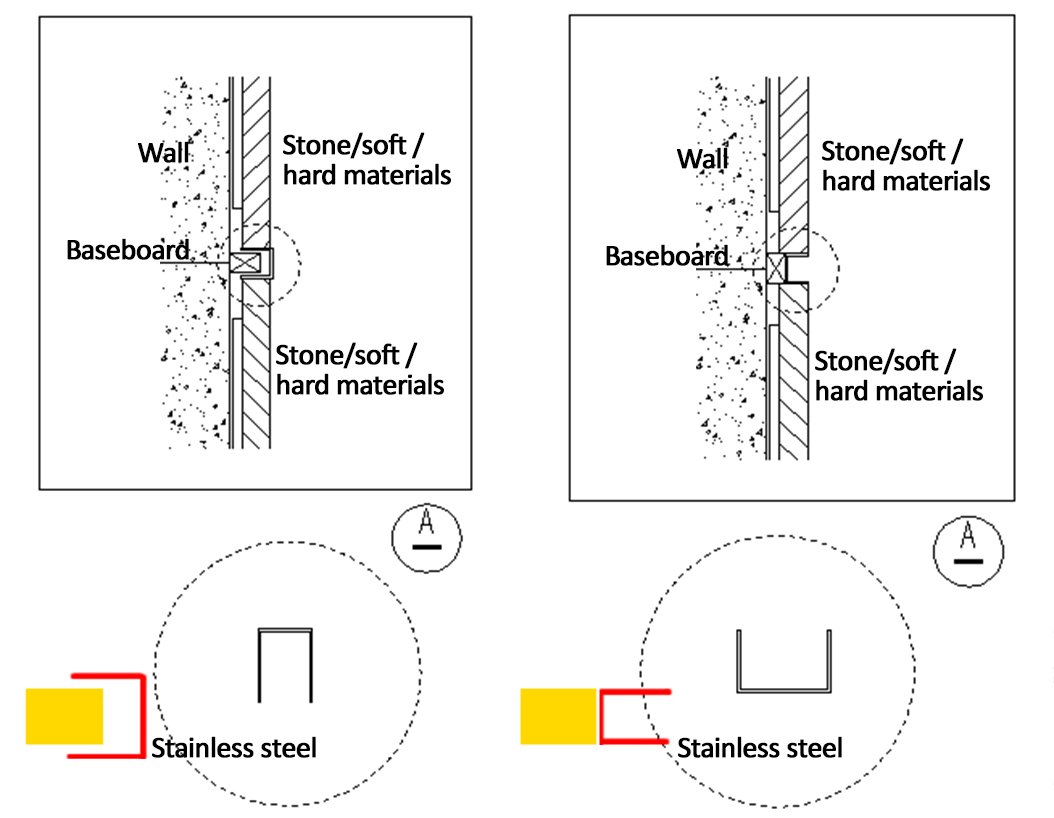
The following figure shows the conventional practice of stainless steel skirting board on the project, and precautions
- There should be folding edges both on and off the kick line to ensure that the kick line is straight and not deformed.
- Leave a 5mm gap between the base layer of the skirting for easy installation.
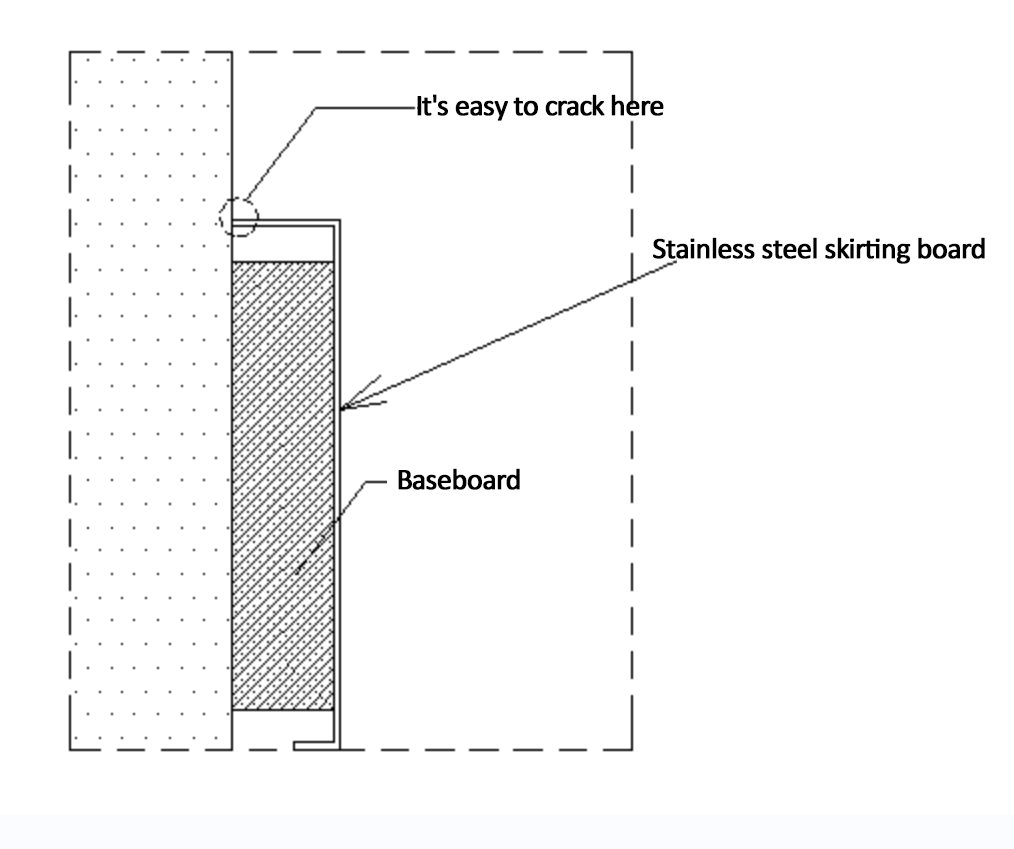
Disadvantage: Cracks are prone to occur at the junction with the wall, which is a common problem in the installation of skirting lines. When the wall is uneven, it is easy to create gaps.
Conventional improvement practices
1.At present, in order to avoid cracking here, an additional seam has been added, but at the same time, it has also increased the difficulty of making the outer corners of stainless steel profiles at the seam.
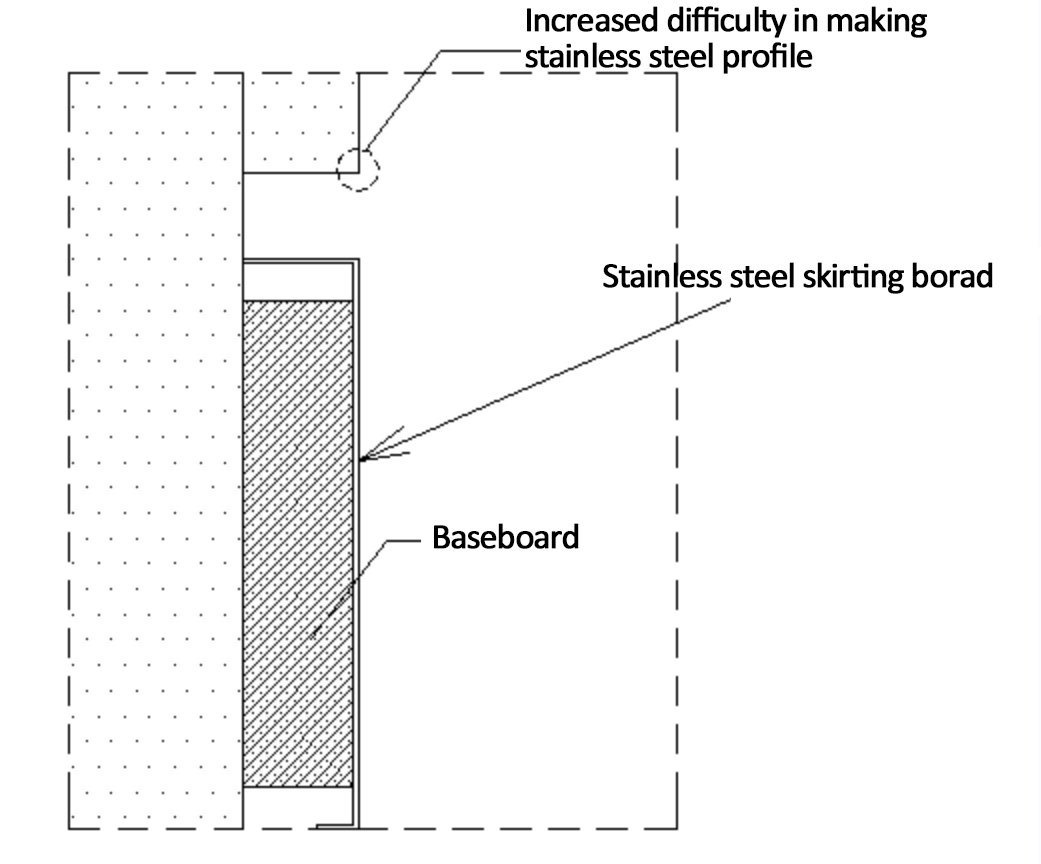
2. In order to avoid the drawbacks shown in the above figure, the structure of the skirting line has been adjusted so that the painter can use the structure of the skirting line to make the seam corners, improving efficiency.
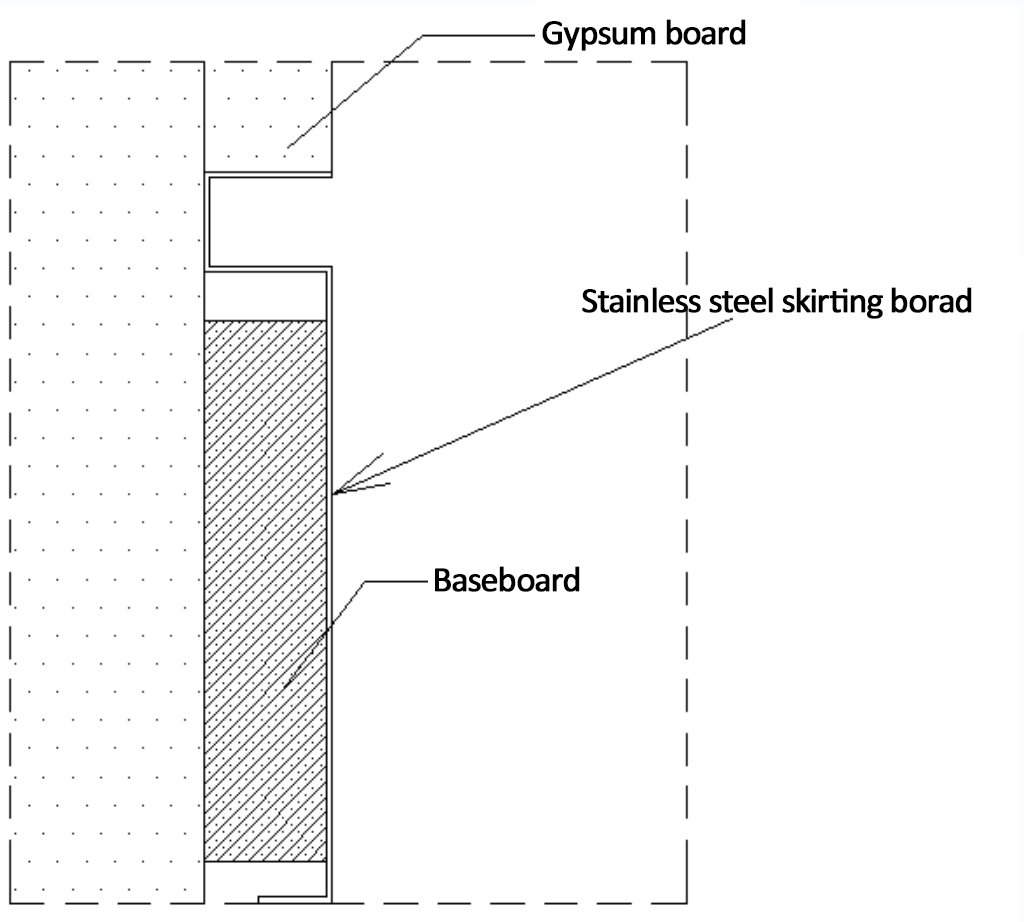
Recommended Steps Following Deepening:
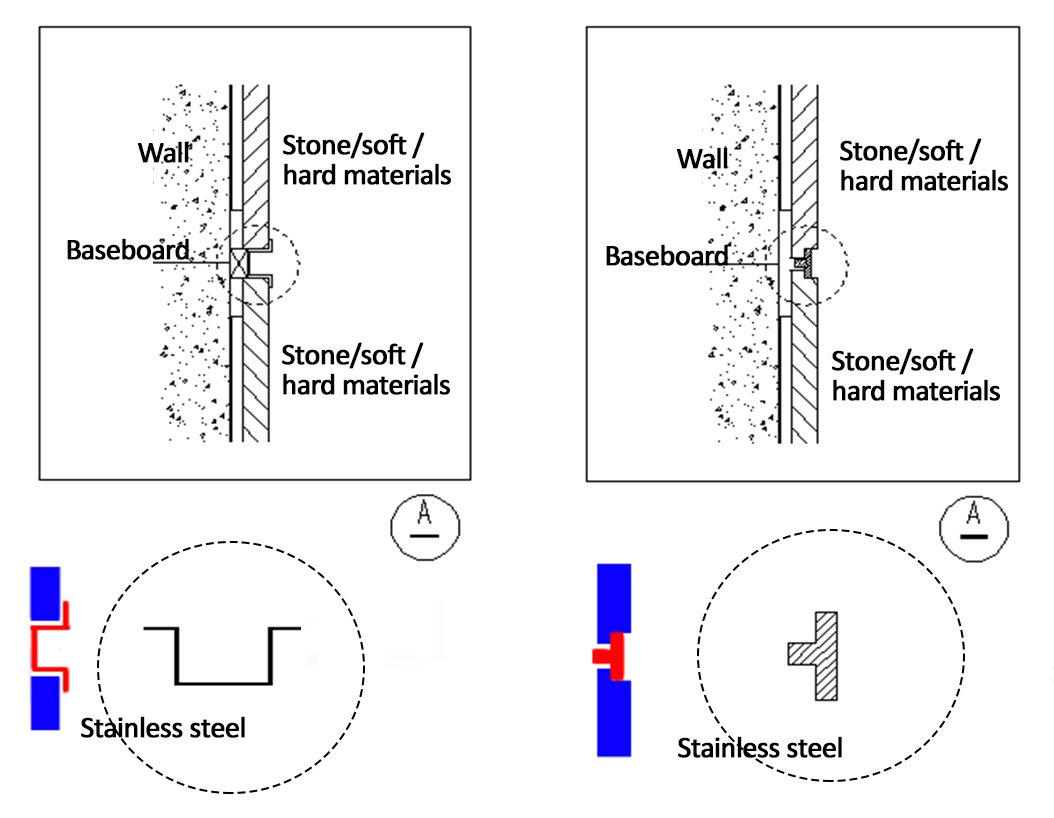
1. Employ conventional methods for crafting the skirting line, using a corner strip to wrap around the seam, which eases installation challenges. When dealing with titanium-plated stainless steel skirting lines, it is advisable to deepen them as depicted in the subsequent image. This approach effectively prevents exposure issues, although it may result in higher costs.
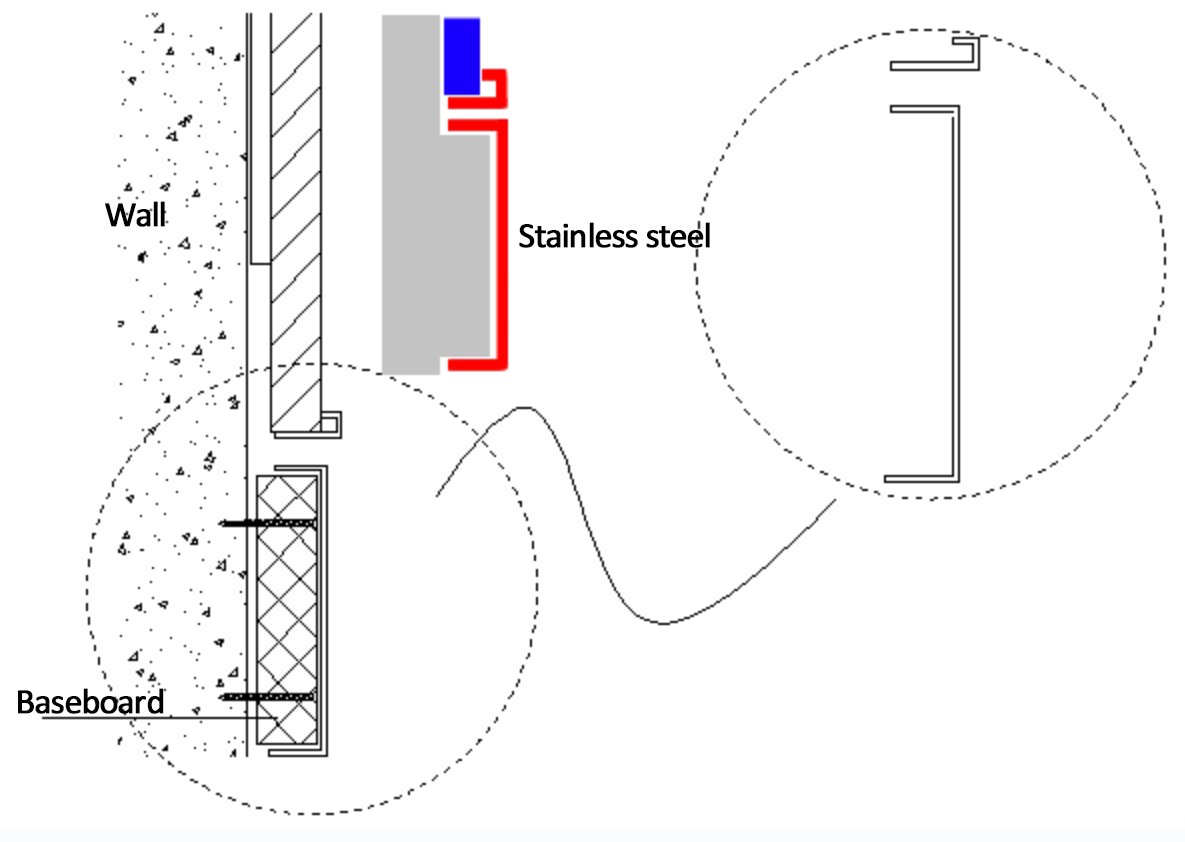
2.The following diagram is also a deepening plan for stainless steel skirting, which is more aesthetically pleasing. The disadvantage is that there is a high requirement for installation conditions, and it is necessary to ensure sufficient space, otherwise the skirting board cannot be stuck in.
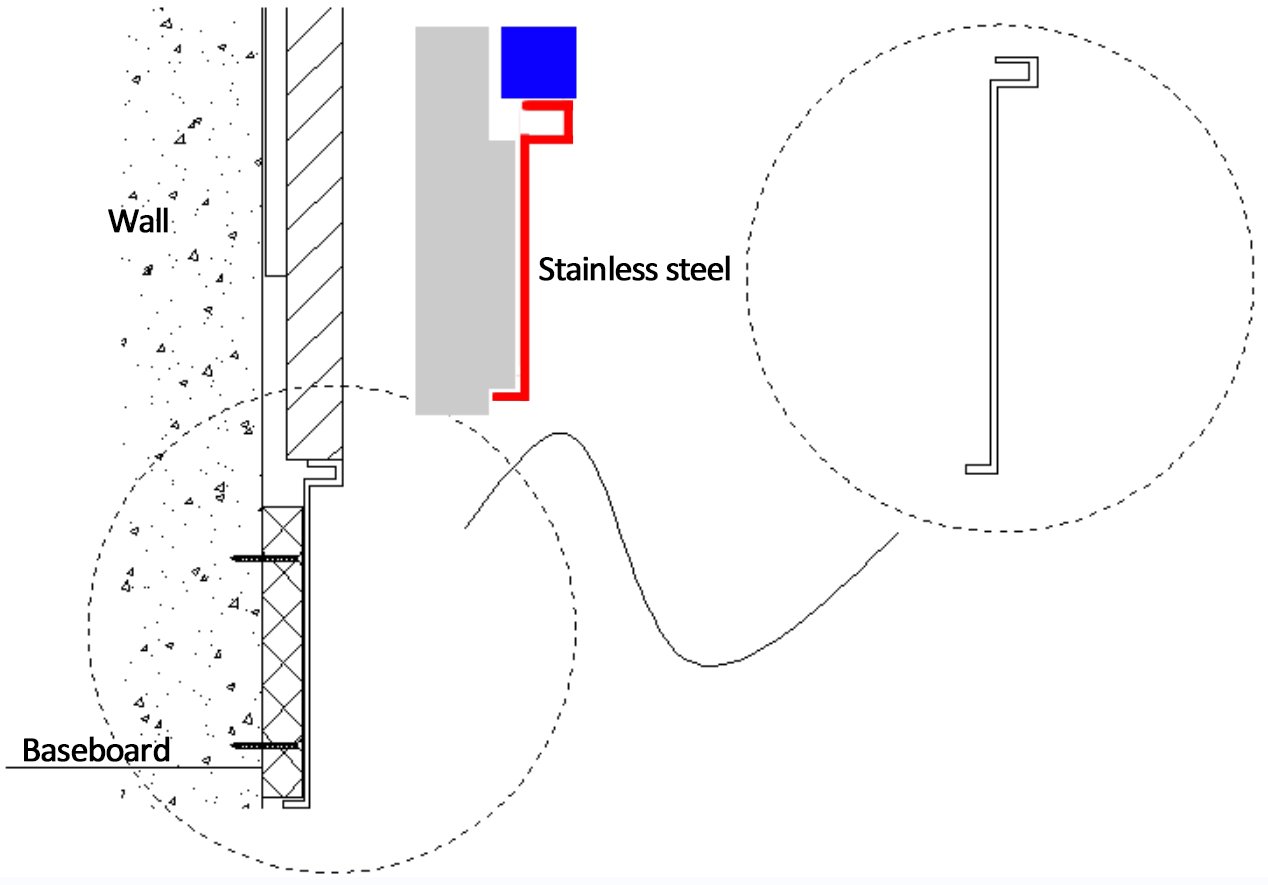
Installation Process of Stainless Steel Trim
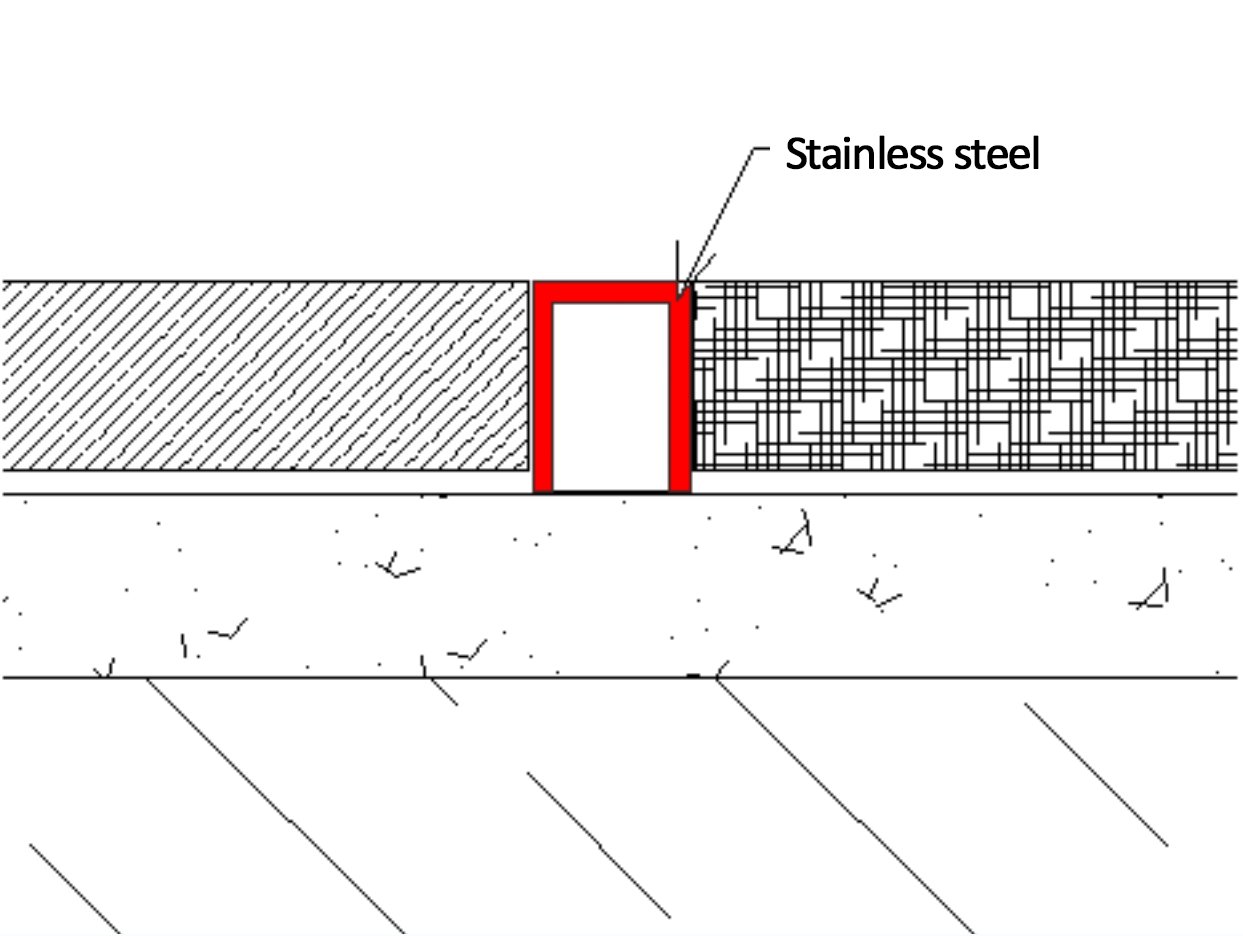
Stainless steel trim between carpet and stone
1.Standard procedure involves employing U-shaped stainless steel grooves for pressure joints, as illustrated in the next figure. The attachment of these U-shaped grooves to the stone depends on adhesive bonding. During installation, side support is necessary, and the support rod can only be removed once the glue sets. This requirement adds complexity to the installation process.
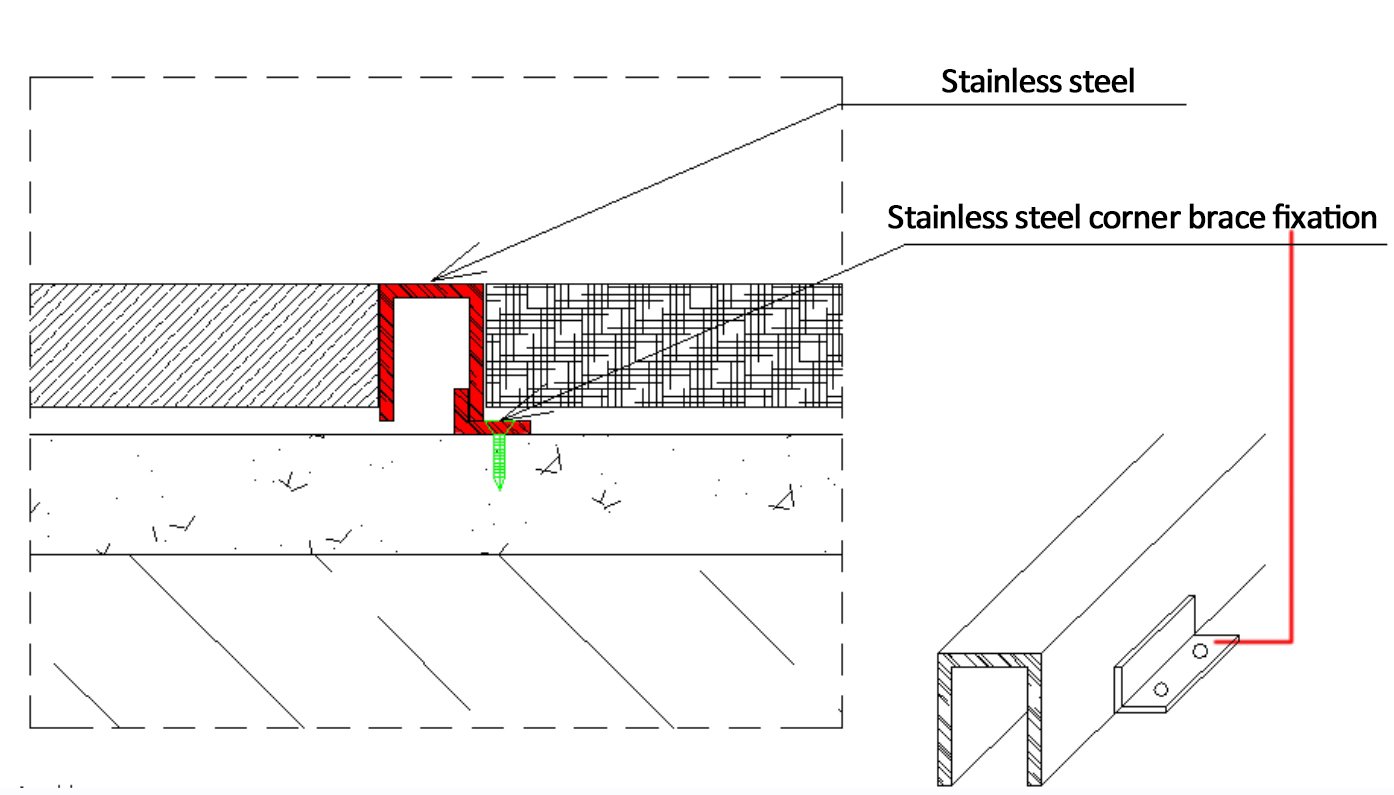
2.The following figure shows the plan to add welding corner brace. In this way, the installation of stainless steel decorative strips on the ground does not require side support. The disadvantage is that the installation of carpets on the construction site, especially in rush projects, may lag behind, and the firmness of the bracket may not be sufficient, leading to the downfall of U-shaped inserts, which invisibly increases costs due to continuous repairs.
3.Hence, it is advised to add an extra fold to the U-shaped strip to bolster its stability. This not only cuts down on costs but also quickens the installation pace, guaranteeing the overall smoothness and evenness of the structure. (See the upcoming figure for illustration)

Stainless steel trim and wooden panel
1.The subsequent figure illustrates our typical approach for creating wooden veneer strips: forming U-shaped strips and affixing them with glue into the joints of wooden panels. However, there are several issues with this technique:
During the installation process, certain areas of the wooden panel may experience bending or the stainless steel strip might deform, causing indentations or protrusions that detract from the appearance. Inconsistencies in the wooden veneer gaps can make insertion challenging, leading to installation difficulties. Additionally, this method necessitates the use of structural adhesive for fixation, which runs the risk of staining the wall.
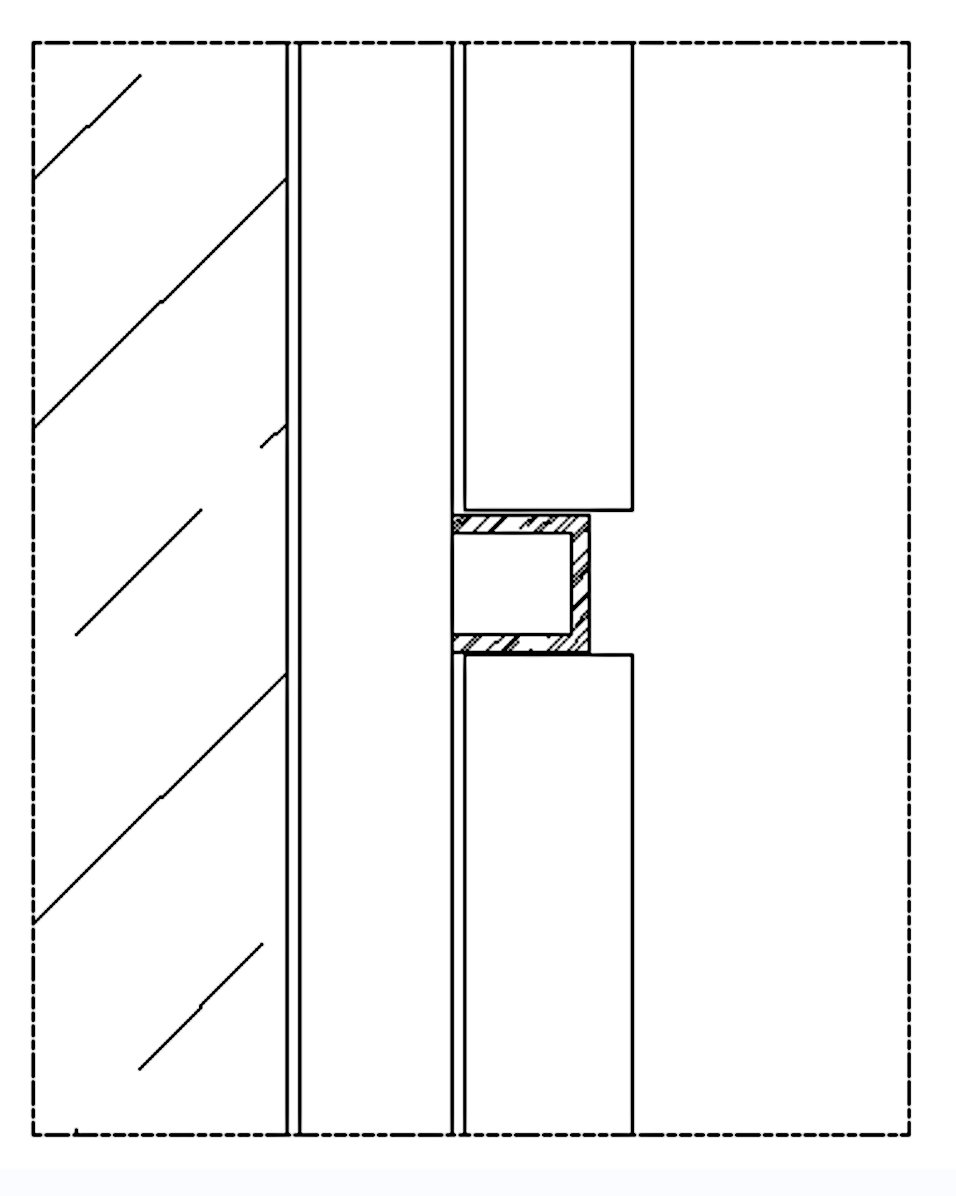
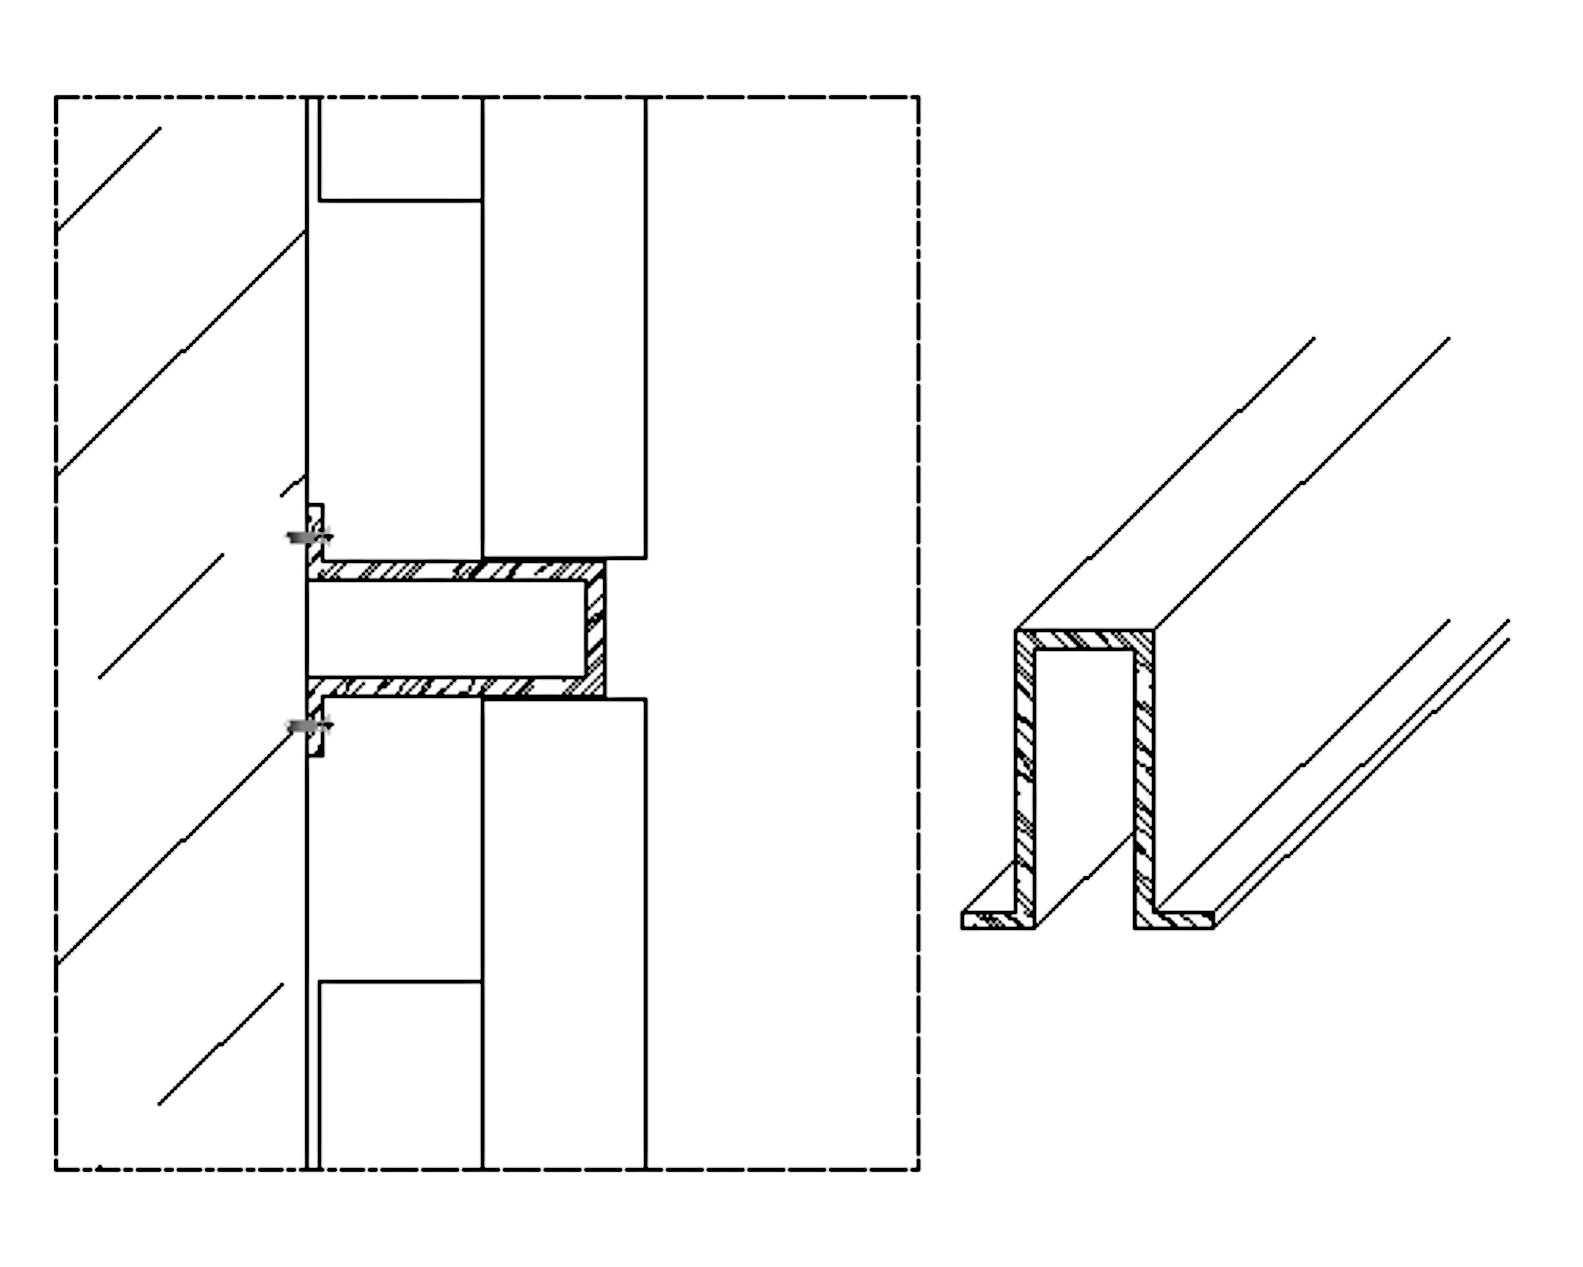
2.The method outlined next circumvents several disadvantages and simplifies installation by using countersunk screws instead of adhesive. However, it necessitates a specific order of assembly, where the stainless steel components must be installed prior to the wooden panels.
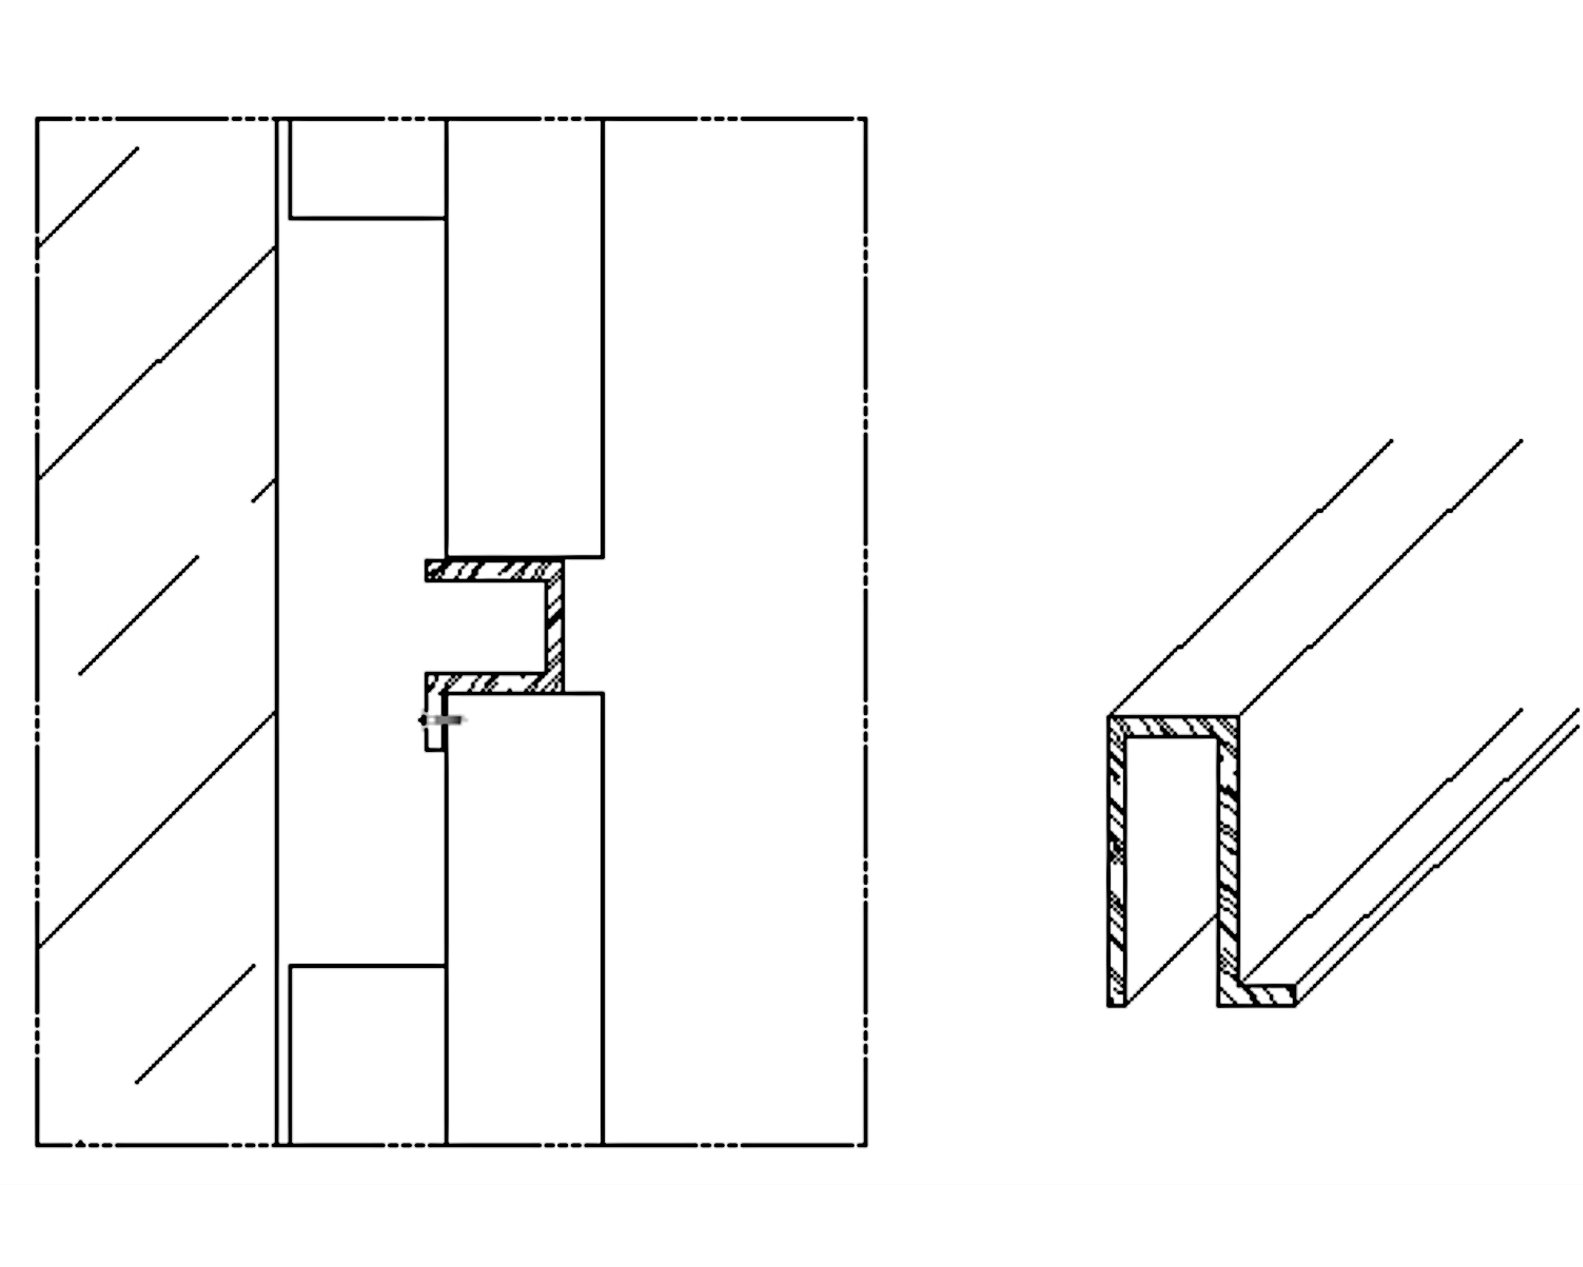
3.The following method is more aesthetically pleasing and has no drawbacks. But it is necessary to cooperate with the wood veneer manufacturer and send the processed decorative strips to the wood veneer manufacturer for installation.
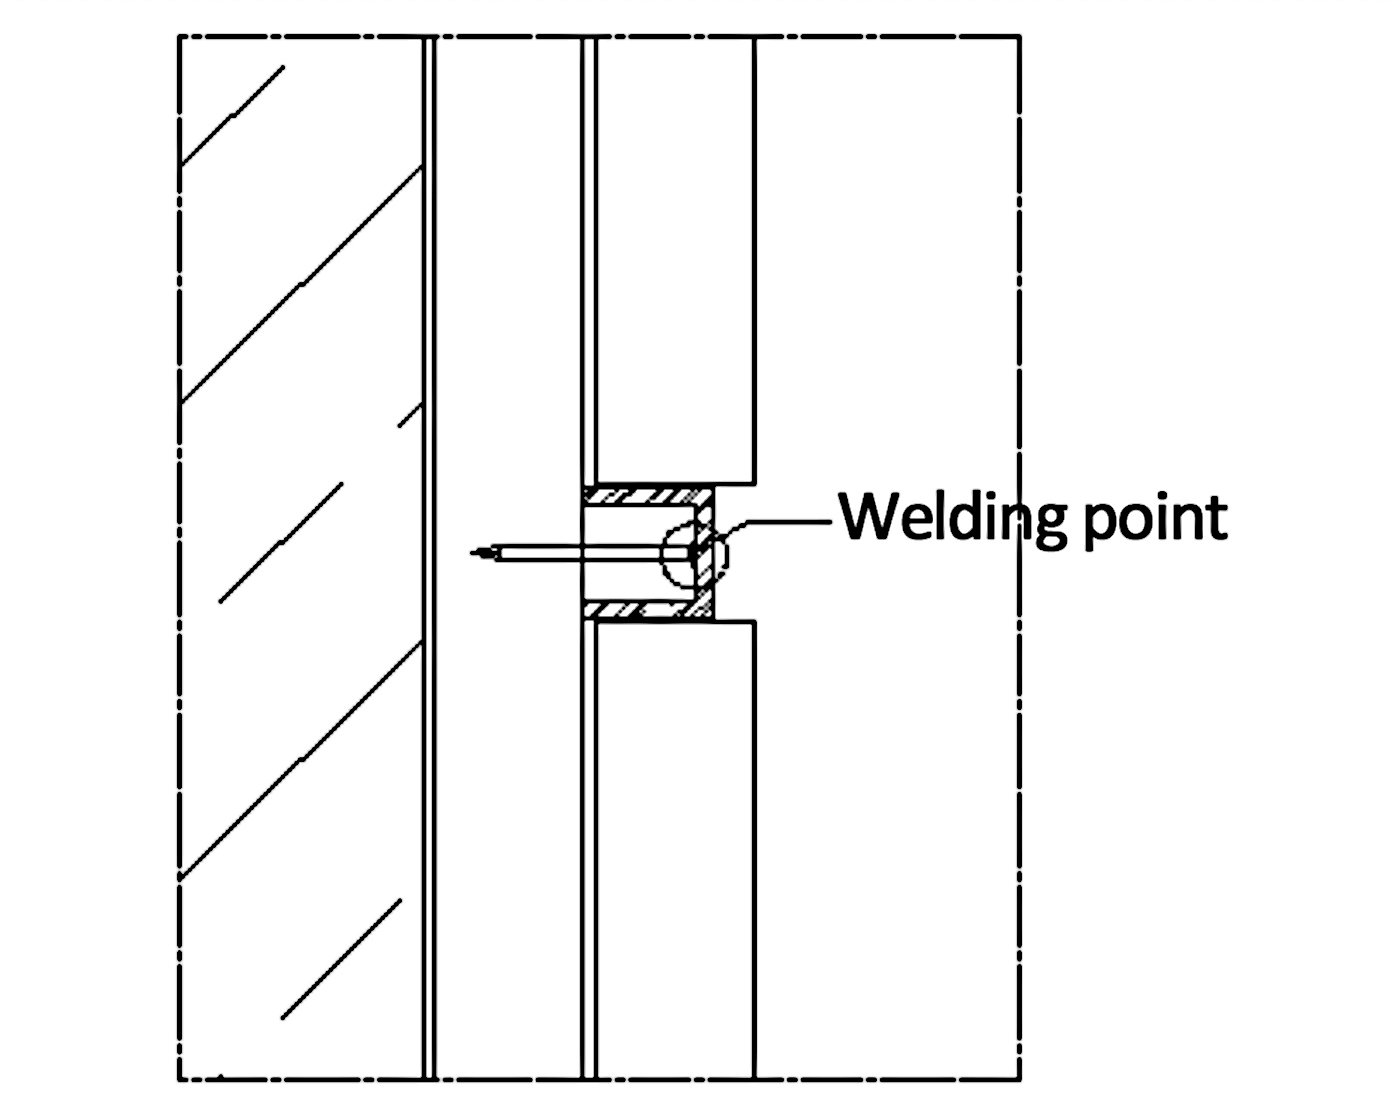
4.This method includes affixing nails by welding them onto the exposed surface of the stainless steel U-shaped and then directly fastening them to the base plate at the site. This approach is apt for expedited tasks, though it’s crucial to maintain standard gap sizes on both sides. However, it’s not ideal for decorative strips that have titanium plating on their surface, as welding can leave visible marks.
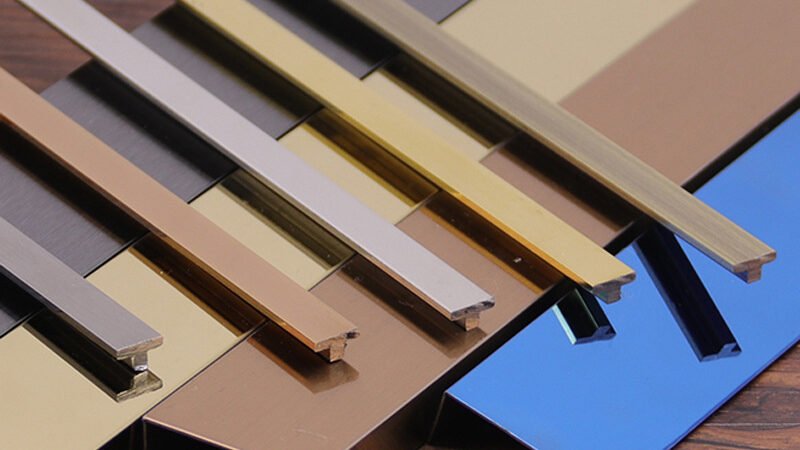
5.The stainless steel profiles described below are now well-developed in practice. It is important that the dimensions of the stainless steel are kept relatively small, typically not exceeding 10mm. Surface treatment presents certain challenges, particularly in the case of mirror titanium plating. And this solid T-bar only has a fixed size.
Stainless steel decorative strip for interface with stone
1.The joint strips of conventional soft and hard decoration and stone are shown in the above figure, and the metal strips are fastened in a U-shaped shape, forming a beautiful seam. The requirement for the size of stone gaps is relatively high, and it is easy to damage the edges and corners of the stone during installation.
2.The stainless steel folding edge is a decorative surface with visible edges.
Stone and external corner stainless steel strip
1.The following is a schematic diagram of the typical practice of stainless steel for stone corner strips.
The stainless steel folding edge is a visible edge. However, using glue during installation can easily cause detachment.
It is recommended to use the deepening nodes shown in the right figure, which are cut and folded from sheet metal to reduce costs. Especially, the pvd outer corners strip can be directly made from pvd sheet, while reducing the processing of opposite sides. Stainless steel edge trim is not easy to fall off with bent edge.
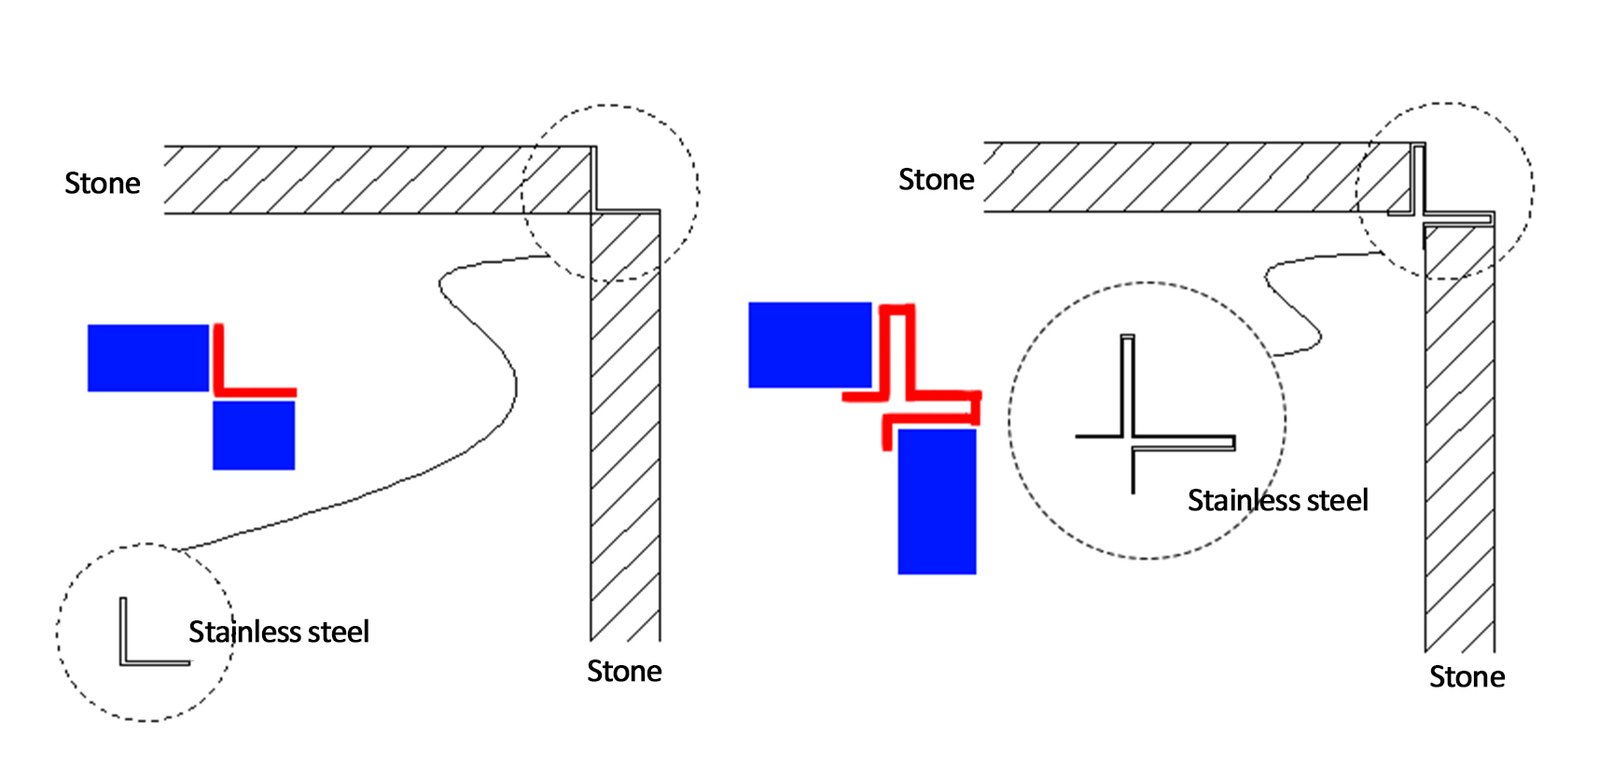
The internal and external corners of stone are made by pressing and forming the pvd stainless steel sheet, which has a more beautiful decorative surface but increases the relative difficulty of production.
You Might Also Like
Please Share This
Recent Posts
- Stainless Steel Color Panels in Hotel Projects: Applications and Design Insights
- Stainless Steel Screens in Hotel Spaces: Design Strategies and Applications
- Large Stainless Steel Planters for Architectural and Commercial Landscape Projects
- Stainless Steel Outdoor Railings: Engineered for Durability, Designed for Style
- Metal Outdoor Signage: Durable, Customizable, and Professional Wayfinding Solutions

