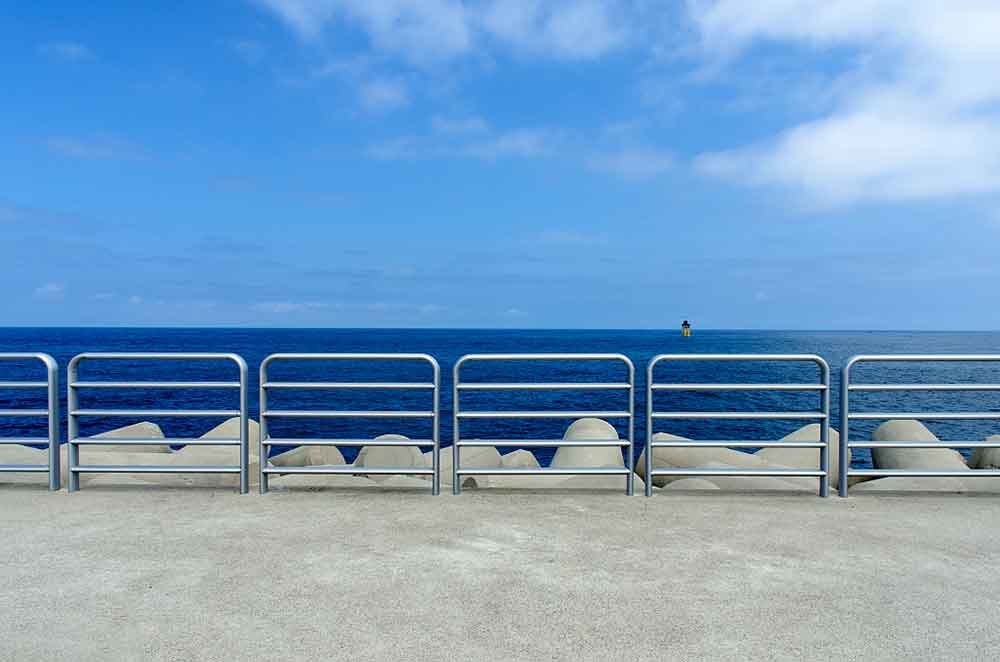
Deepening Solutions for Stainless Steel "Edge Trim" - Frame & Railing
Table of Contents
Analysis of Stainless Steel Mirror Frame Installation
1.The conventional practice for stainless steel mirror frame is to first install the mirror, and then install stainless steel framearound the edges.
The disadvantage of this approach is that it is not easy to replace the mirror when it is damaged in the later stage. Insufficient space during welding can easily cause damage to the finished surface. Later replacement is more troublesome.
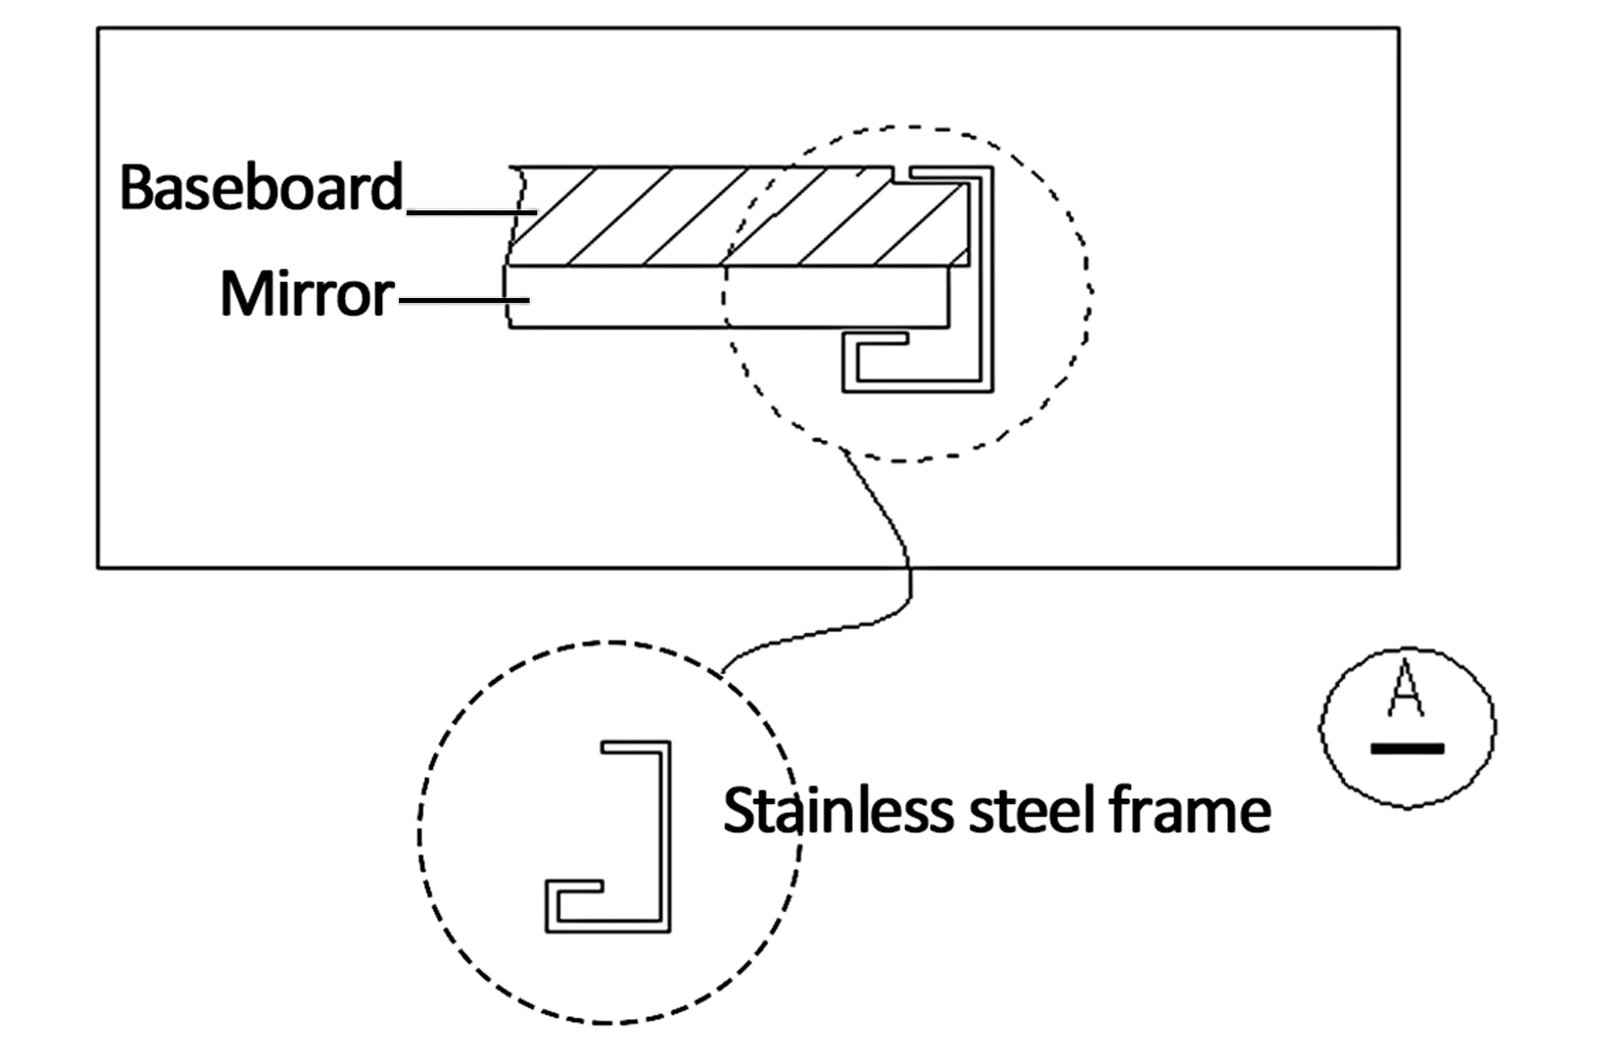
2.This installation method requires the fitting of a stainless steel frame line prior to the placement of a mirror, which is then secured within this frame line as a complete product. Consequently, in later stages, precise measurements for the mirror become crucial, leaving a 1-2mm gap for ease of installation. This approach also simplifies the removal of the mirror if it gets damaged later on.
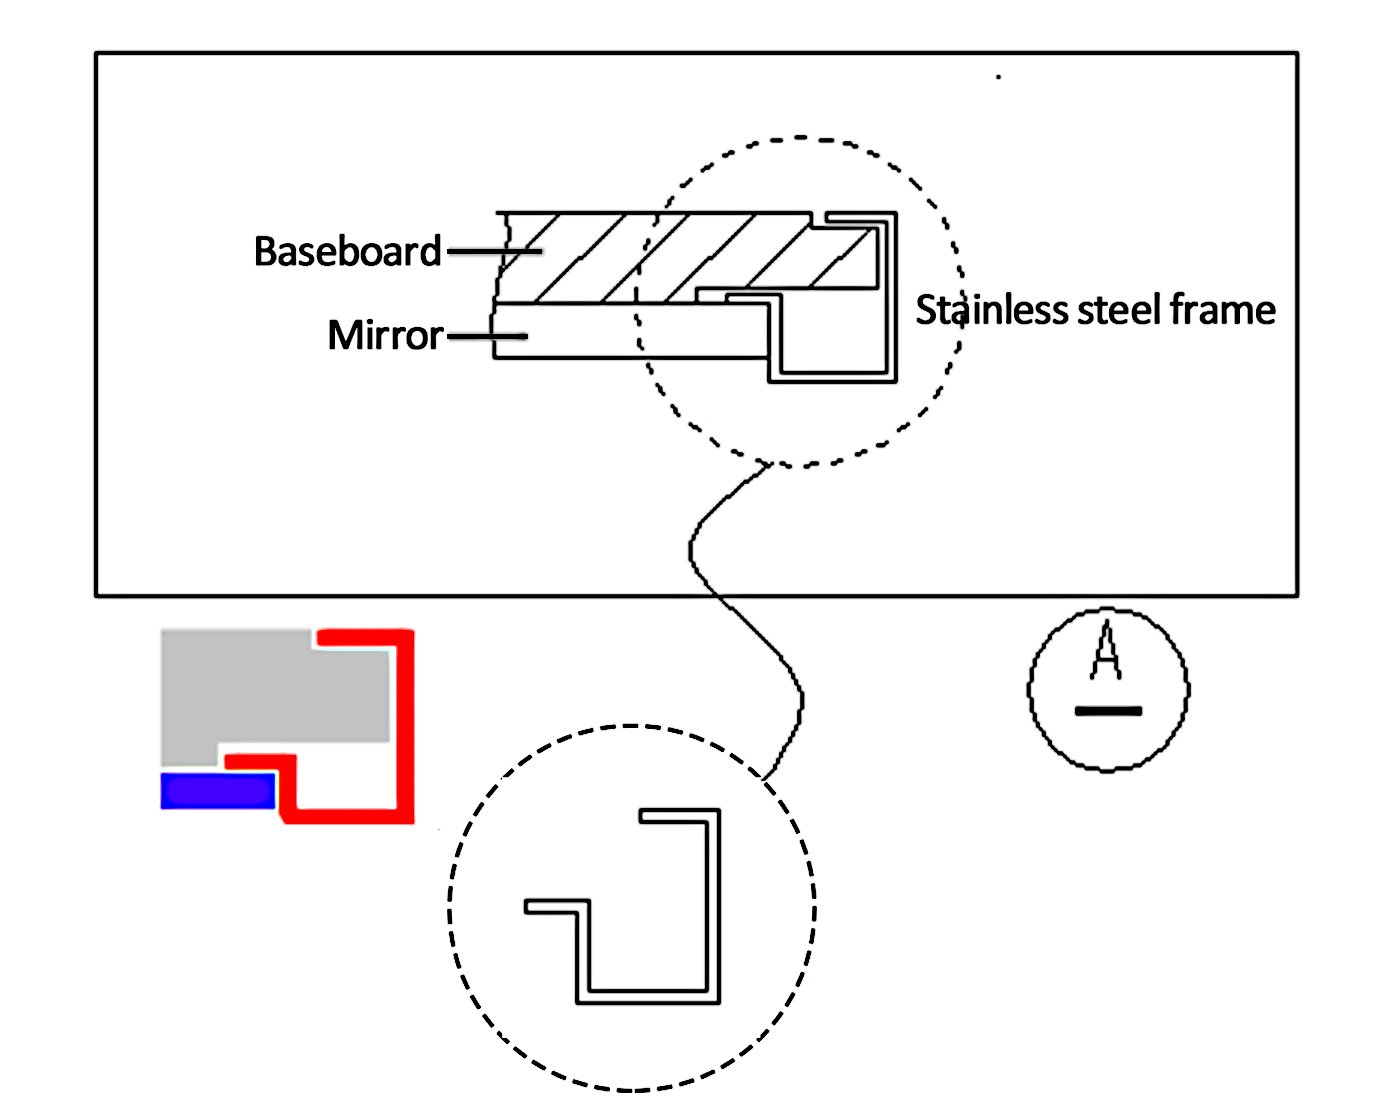
3.The process of creating pre-made mirror frames shown in the subsequent picture is our preferred approach. Stainless steel frame wires can be fabricated in the factory and then assembled at the site. The quality of stainless steel finishing done in the factory surpasses that of on-site work, leading to relatively better aesthetics. Additionally, this method allows for easier disassembly later on.
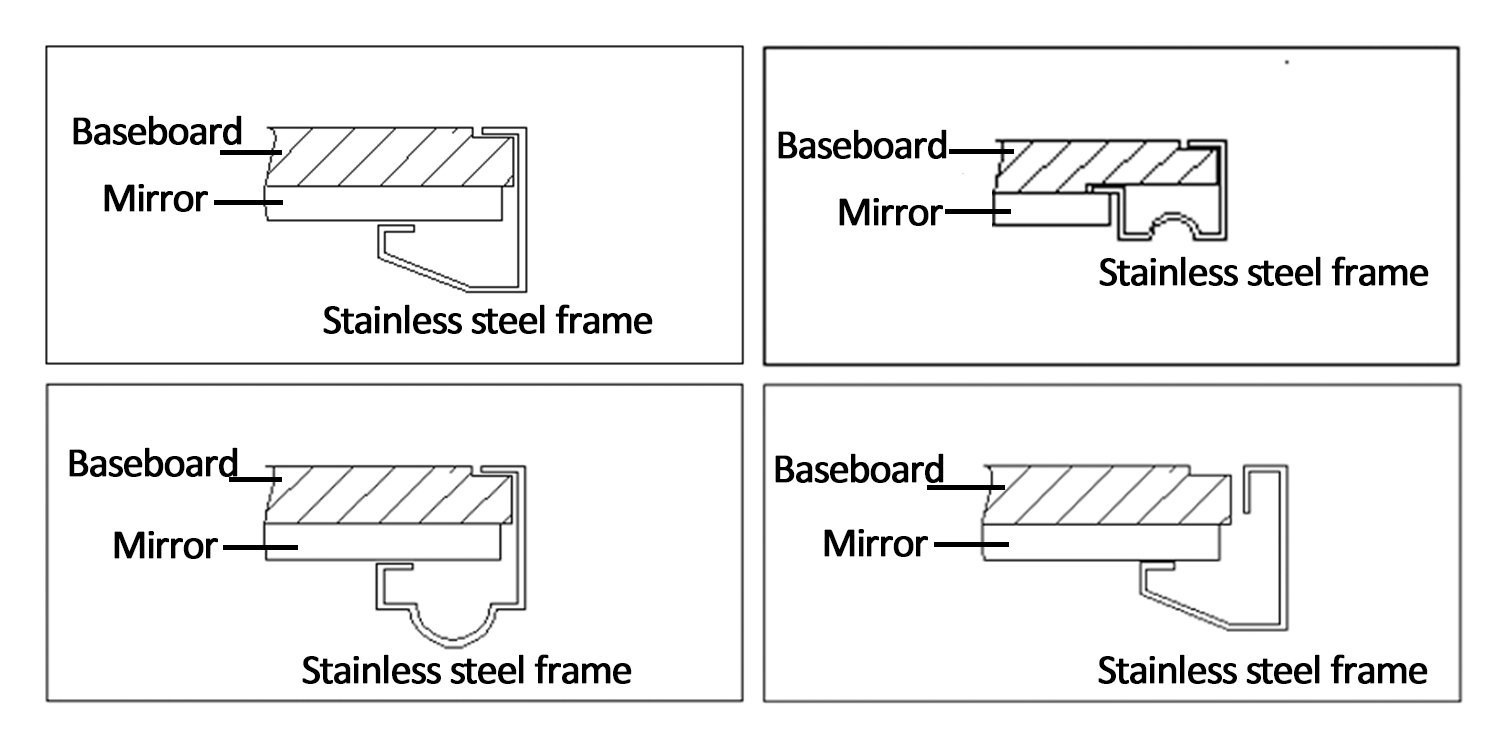
Structural Analysis of Stainless Steel Partition Frame
Stainless steel glass partition frame
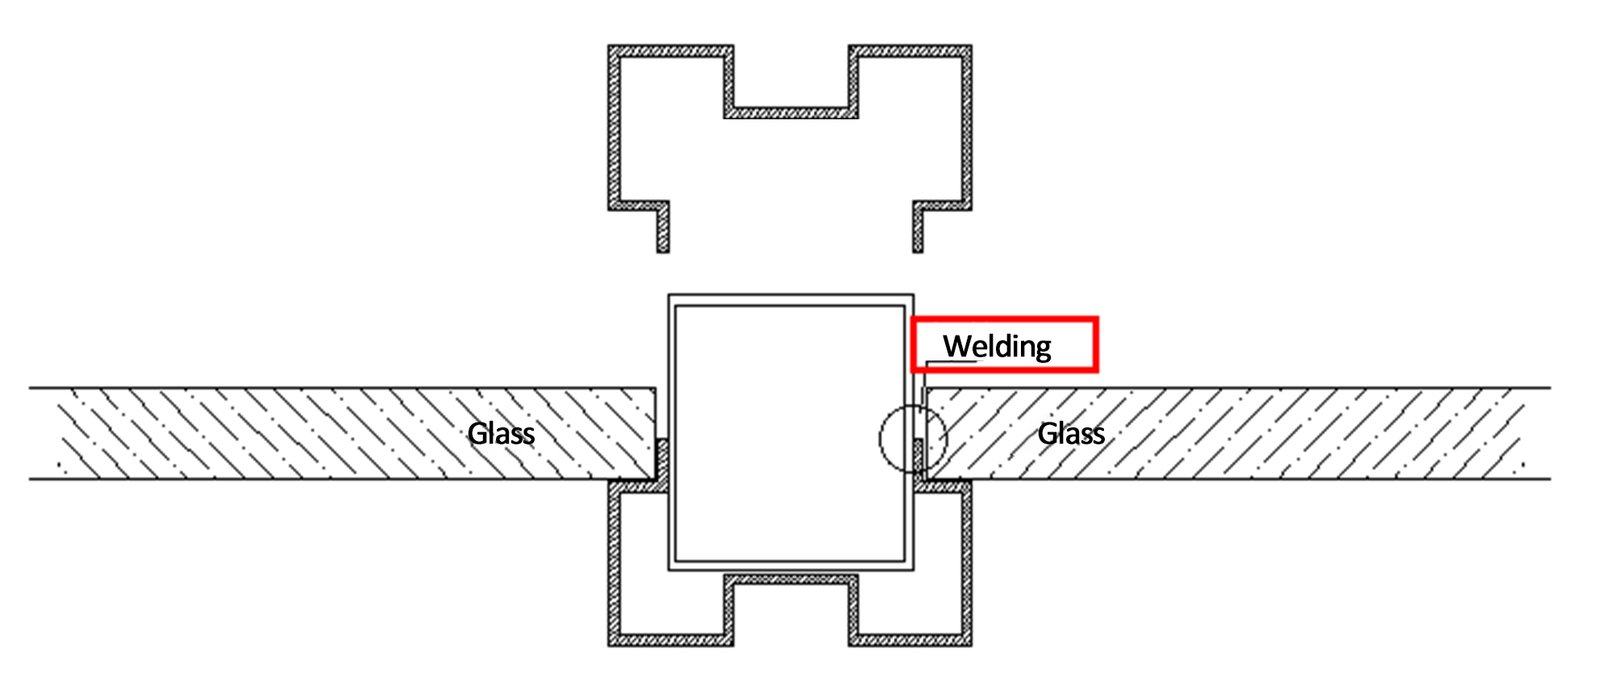
1.The conventional practice is to fold the plate into two grooved cladding plateand weld them onto the steel pipe base. If the quality requirements are high, it is necessary to ensure that the finished product is coated with color. One common problem with finished product coating is that it is difficult to achieve the desired effect on the inner corners of the grooves. ▼
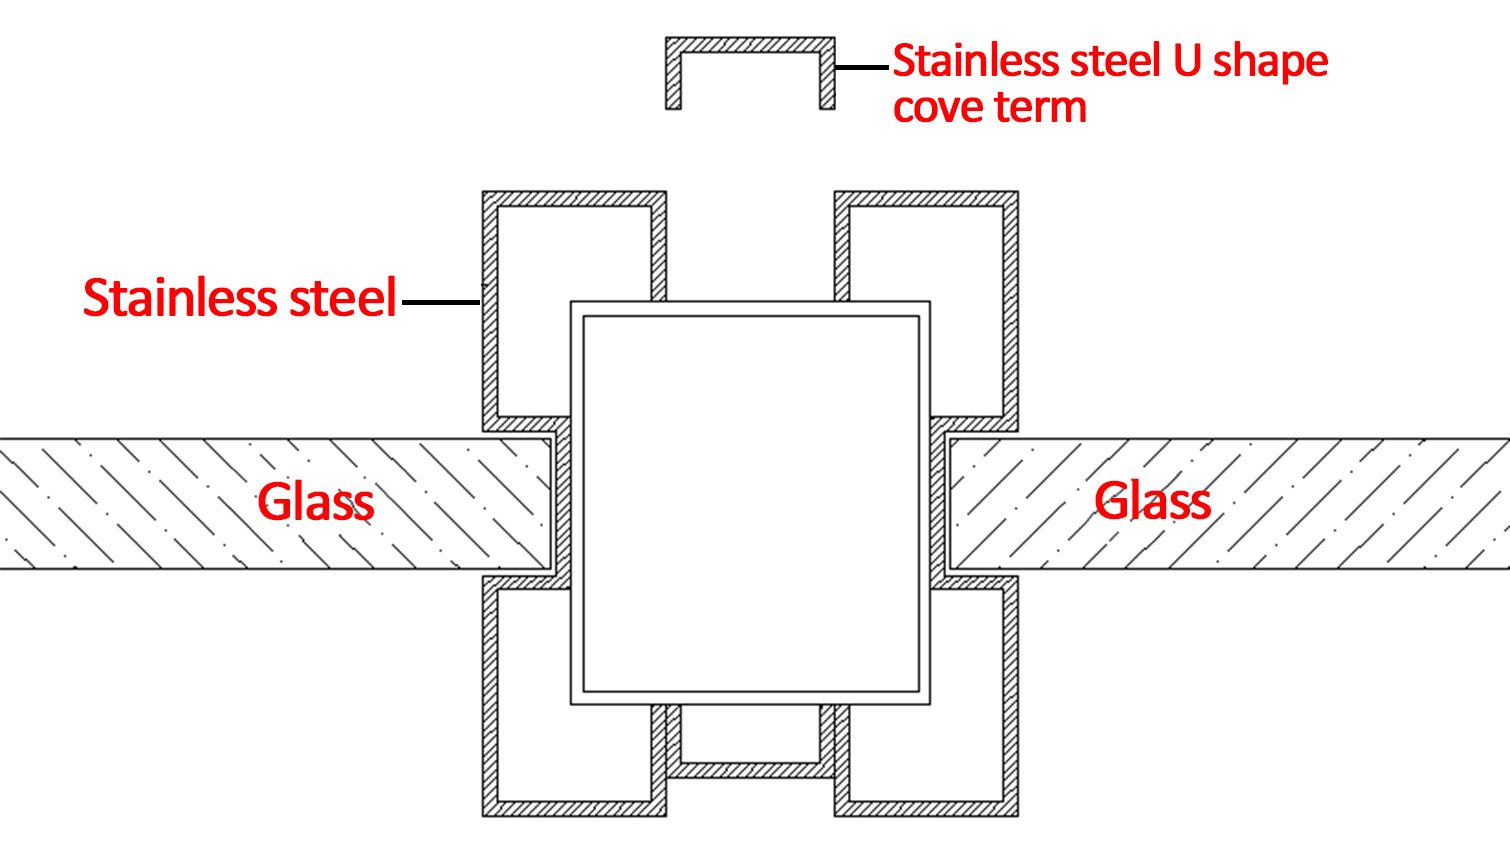
2.The partition border after structural improvement. This is using a U-shaped cover trimto cover the welding defects between the stainless steel cladding and the base layer. The reserved size of the U-shaped cover trim is required to be accurate, otherwise the U-shaped card slot may deform or have gaps. ▼
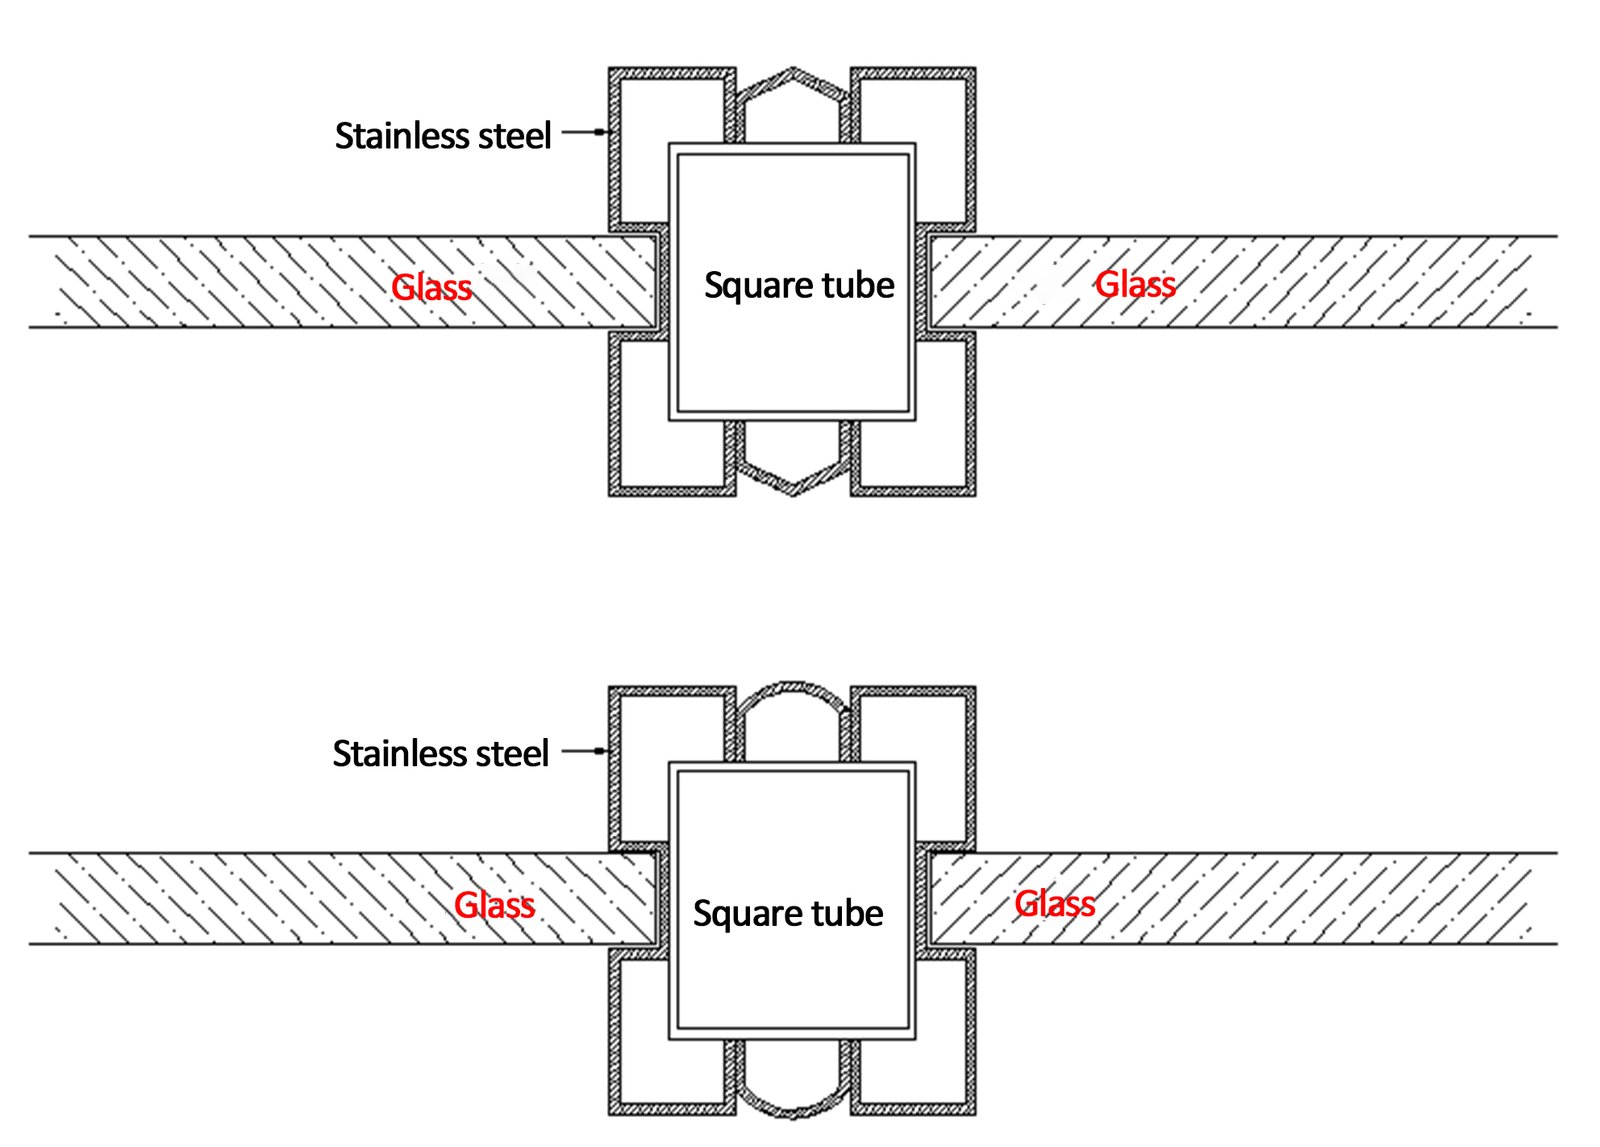
3.The recommended method is as shown in the figure below, which adjusts the shape of the visible part on the basis of the original U-shaped cover strip, so that even if there is deformation when the strip is stuck in the seam, it is covered by the shape of the slot itself. ▼
Deepening the Installation of Stainless Steel Railings
Single-column stainless steel stair railing
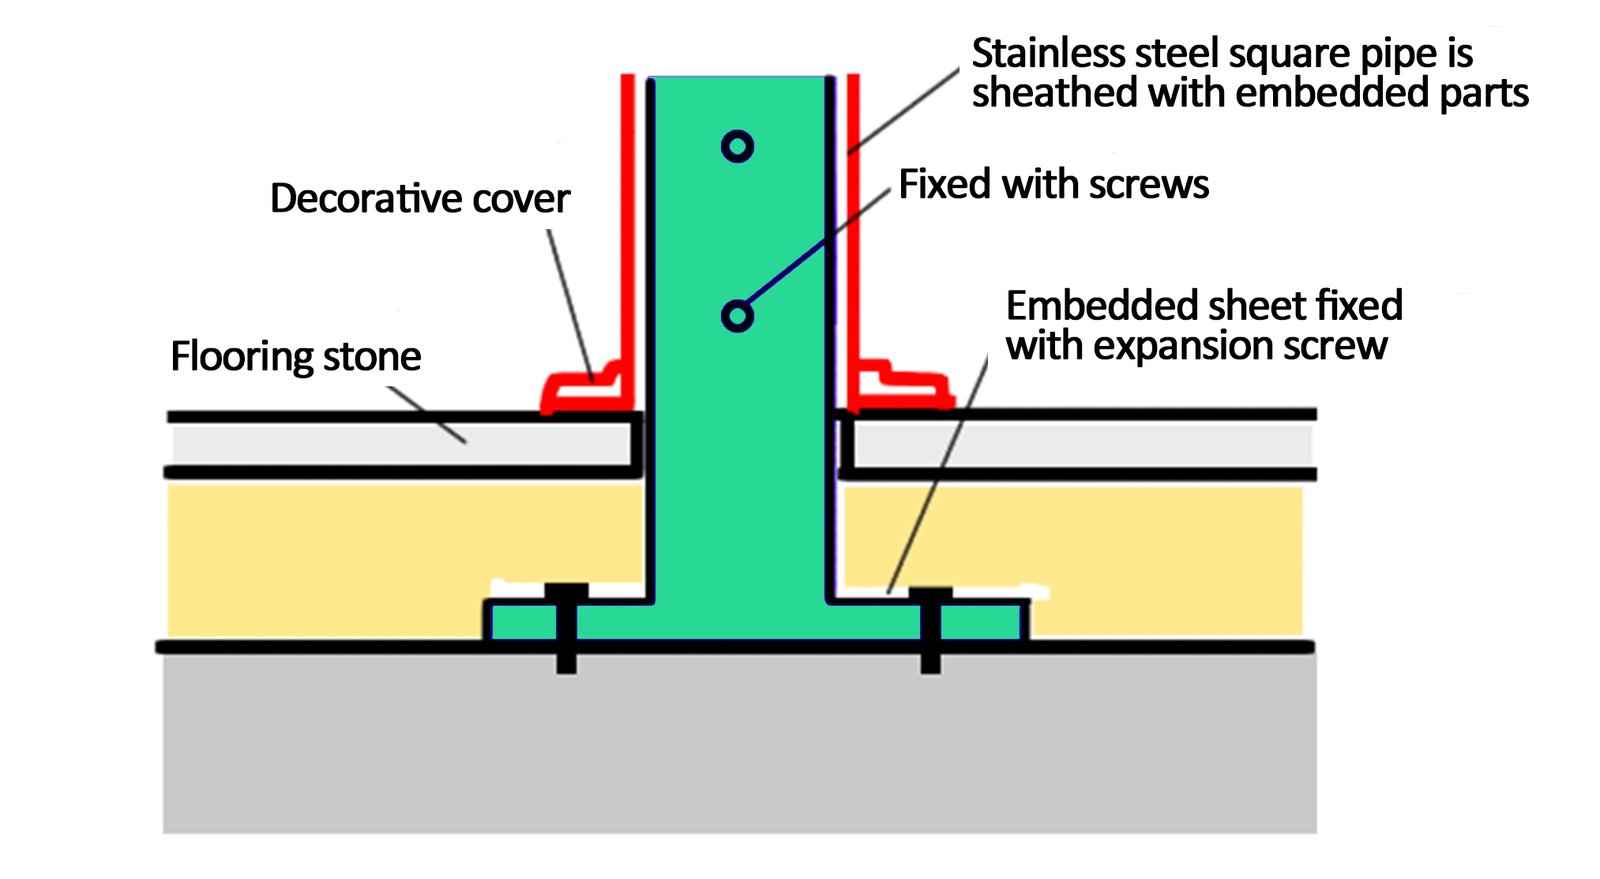
1.The railing’s column consists of two square tubes, each 2.0 mm thick, clamping stainless steel embedded parts at the bottom and handrail connectors at the top. These embedded parts are installed prior to the stone laying. The stone is then fitted after pore-opening, with a flange cover concealing the gaps resulting from the stone cutting.
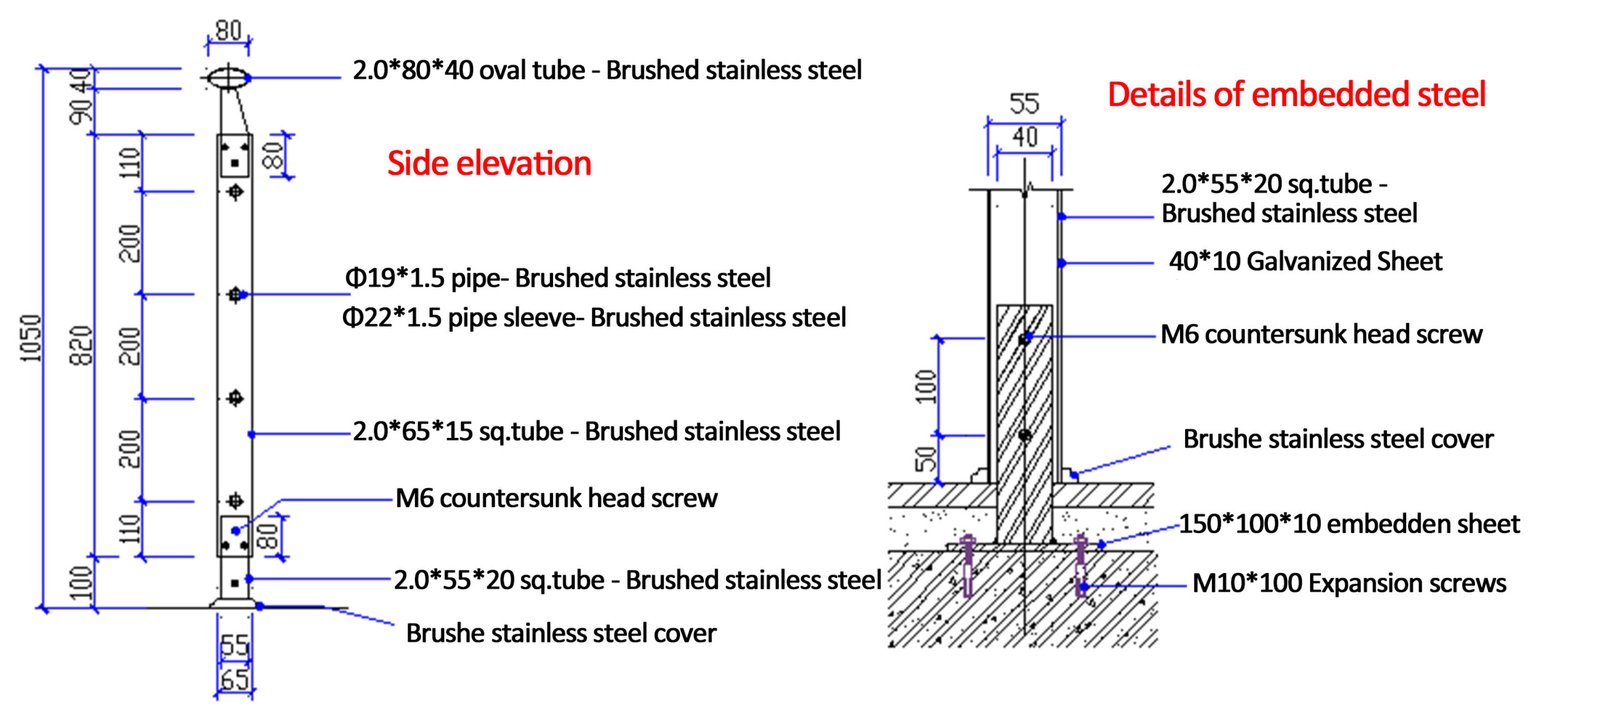
The main feature of this method of railing is to install the embedded parts before laying the step board, and the position of the embedded parts is required to be very accurate.
2.Another approach to installation involves a key variation: securing metal embedments onto the stone post-floor stone installation. These metal embedments should be anchored using an expansion tube, ideally utilizing a stainless steel embedded sheet. Subsequently, the column is welded to this embedded sheet. To conceal any welding imperfections, a decorative cover is applied.
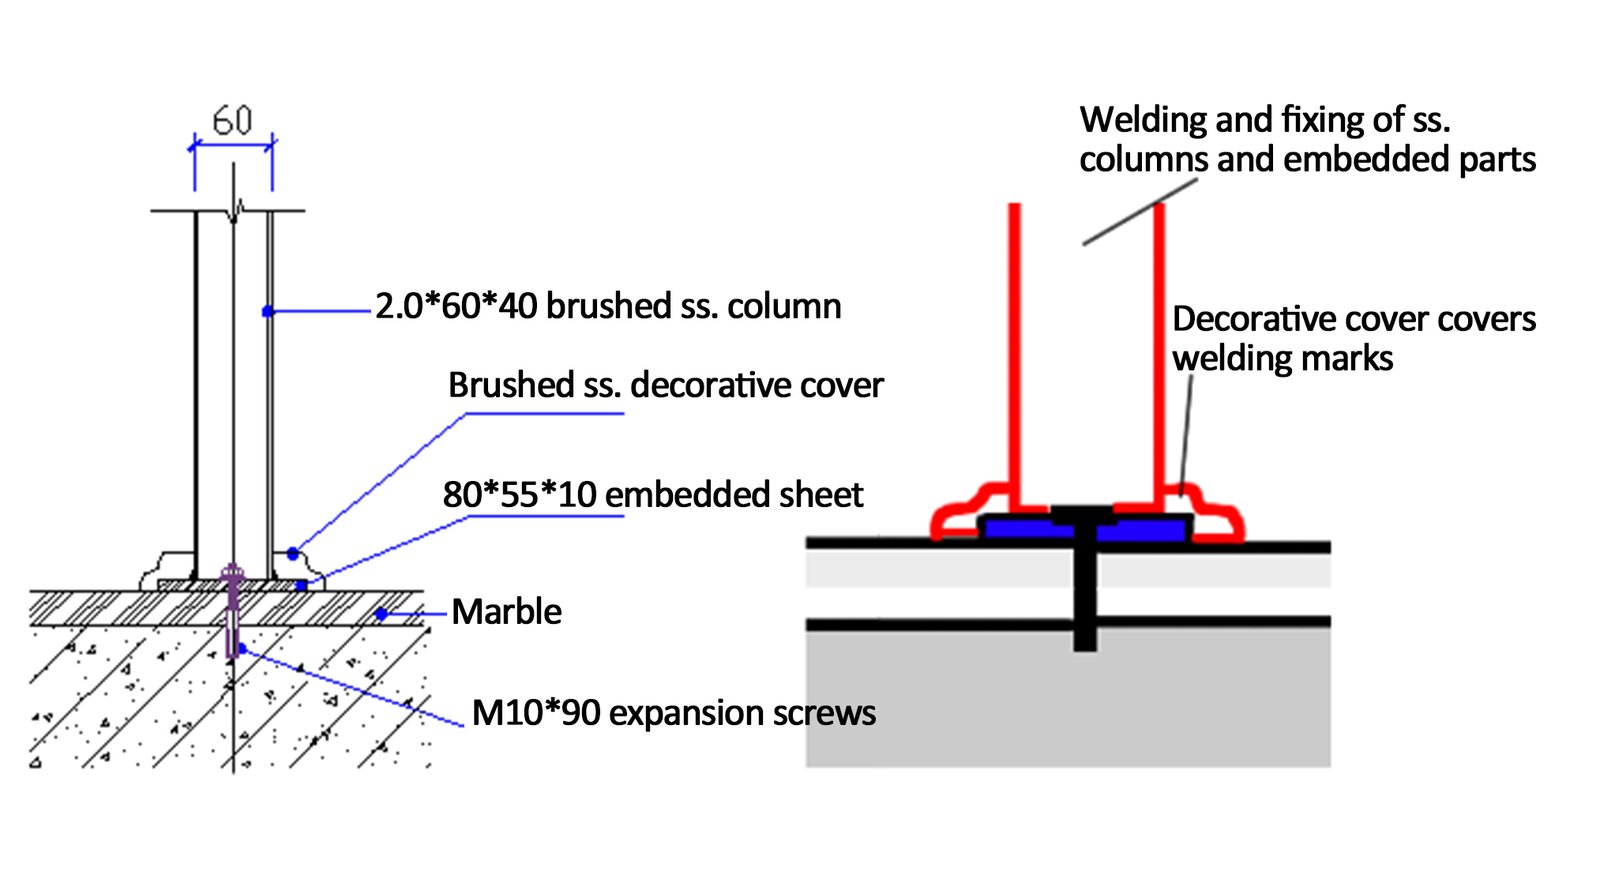
Installation guidelines:
- Due to the stress considerations, this method of installation is recommended for staircases using stone. It is advised not to use this technique with other materials like ceramic tiles.
- Once the laying process is complete, a waiting period of 3-4 days is required before any further construction on the stone to allow the base mortar to set properly.
- For enhanced stability, it’s advisable to use adhesive on the embedded plate when installing the expansion pipe, if possible.
Stainless Steel Handrail Installation Process
The first image depicts the initial step of installing embedded components before wall painting. This involves welding the armrests and embedded parts, followed by painting the wall to conceal any flaws resulting from the welding process.
The second image illustrates the process of affixing embedded components on a pre-painted wall. This step is succeeded by the welding of handrails and embedded parts, with the final touch being the application of flange cover plates to mask any installation imperfections.
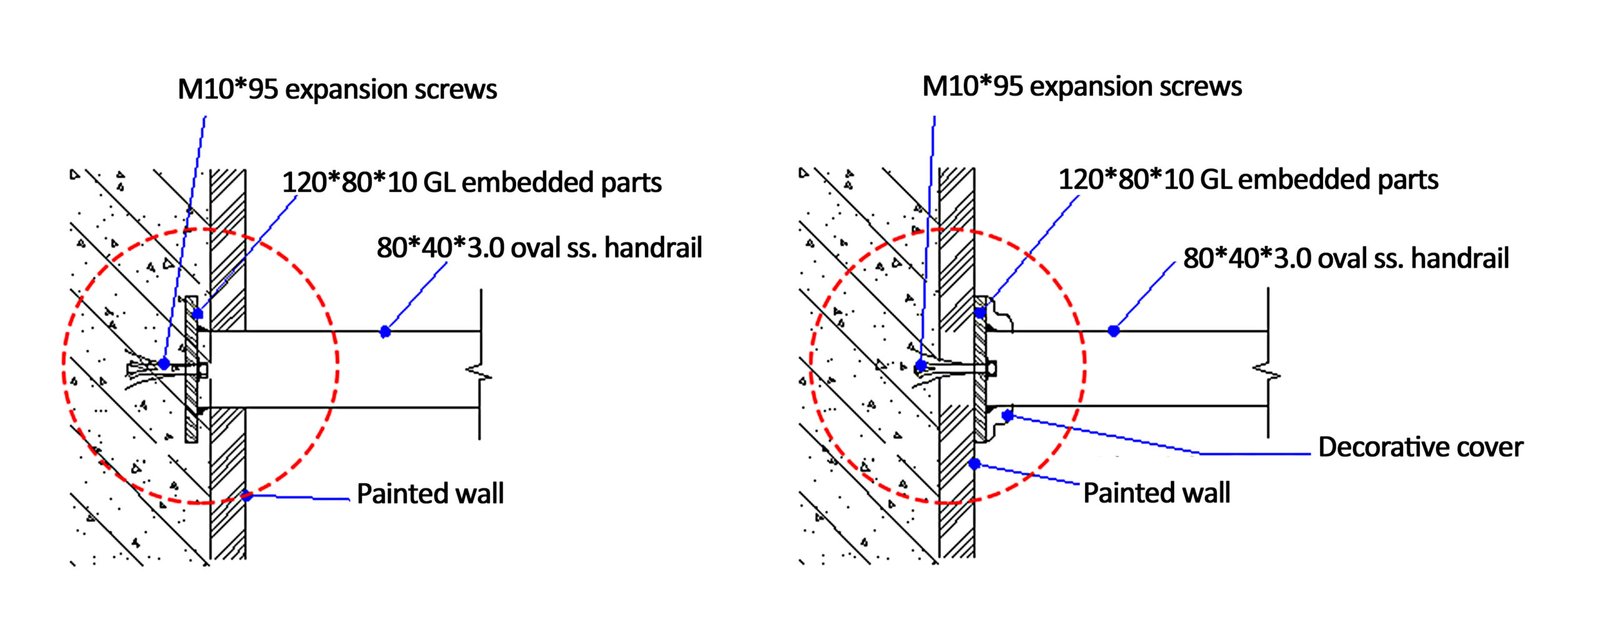
▲ Schematic diagram of the connection between the handrail and the wall
You Might Also Like
Please Share This
Recent Posts
- Stainless Steel Color Panels in Hotel Projects: Applications and Design Insights
- Stainless Steel Screens in Hotel Spaces: Design Strategies and Applications
- Large Stainless Steel Planters for Architectural and Commercial Landscape Projects
- Stainless Steel Outdoor Railings: Engineered for Durability, Designed for Style
- Metal Outdoor Signage: Durable, Customizable, and Professional Wayfinding Solutions

