Various Techniques for Installing Metal Room Divider
Table of Contents
Introduction
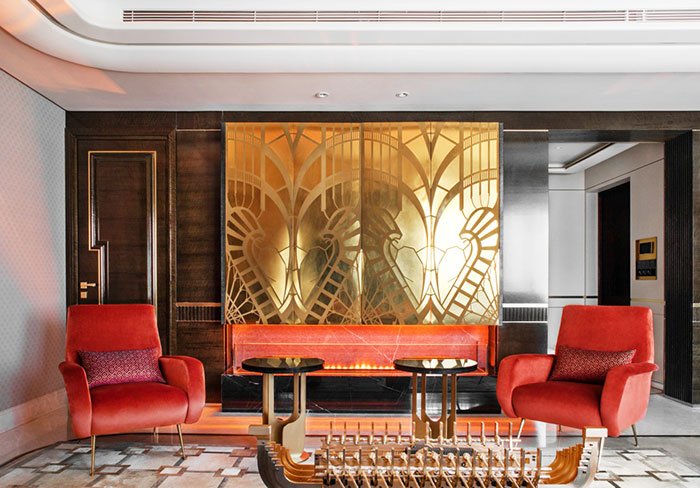
When it comes to installing a metal room separator, the impact on the room’s overall appearance is significant. Not only does it introduce a modern, sleek look, but it also facilitates the creation of multiple zones within a single space. These dividers are particularly handy in workspaces that require distinct areas for diverse tasks or people. The installation process for such partitions is relatively straightforward and offers several methods, each suited to particular project dimensions and budgets.
Method One: Using Tracks or Panels
The use of tracks or panels is the most popular technique for installing a metallic room partition. This is particularly cost-efficient for more expansive settings.
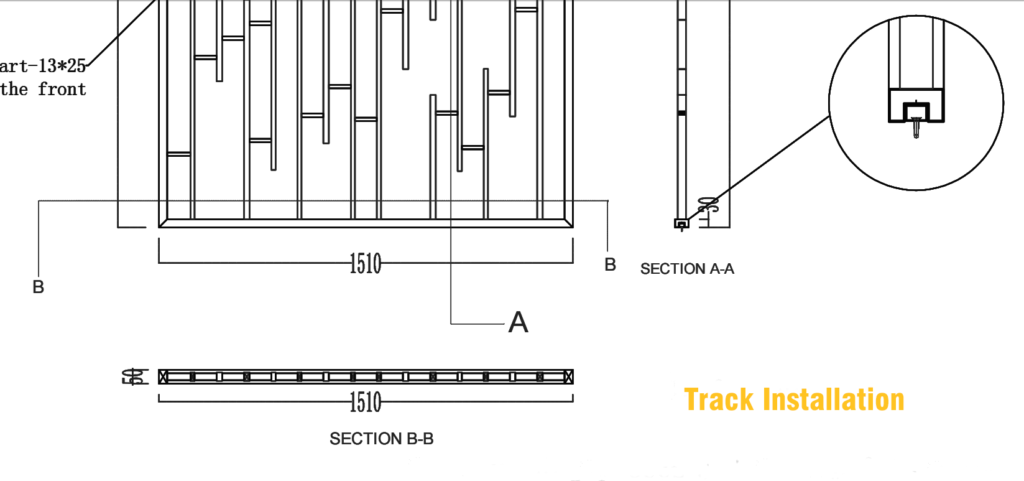
Step-by-Step: Installing Sliding Metal Partitions
Mark the wall where the top and bottom tracks will go. Ideally, position the bottom track no more than 10 inches from the floor and the top track within five feet from the ceiling. Attach the mounting brackets to these positions using screws and wall anchors.
Align the top and bottom tracks to the floor, marking their corresponding positions on the wall. Fasten these tracks to the wall using screws and anchors. Ensure both tracks are perfectly level; the bottom one should be marginally elevated from the floor. After this, cut the track according to the pre-measured space dimensions.
Now, focus on installing and aligning the door for smooth sliding. Place the door in the bottom track, making sure it aligns well. Perform a final slide test to verify its smooth operation before fastening it to the top track with metal-compatible screws.
The concluding step involves attaching the door handle. Use screws made for metal to secure the handle, ensuring it lines up with the top track for smooth door operation.
Method Two: Portable Partitions for Limited Spaces
In smaller environments, a free-standing metal room separator might be more applicable. These units are generally compact, lightweight, and easy to relocate, offering a quick solution for temporary needs. These stand-alone units usually feature a built-in lock for additional safety.
Method Three: Wall or Ceiling Fixed Screens
The last option for setting up a metal partition is wall or ceiling mounting. Although this approach is more labor-intensive and expensive, it provides a long-term solution that’s often more visually appealing.
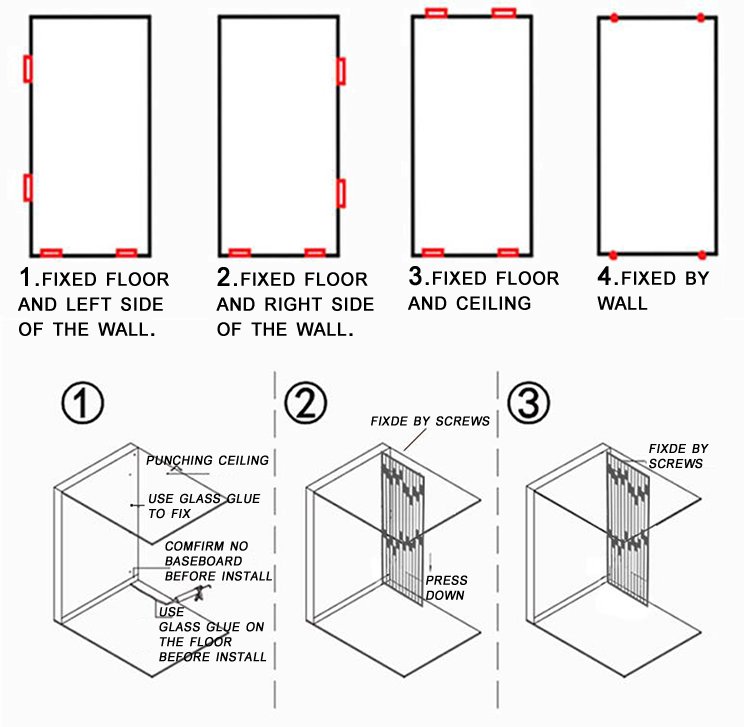
Steps for Ceiling or Wall Mounting
Start by gauging the overall space dimensions where the partition will be installed, accounting for the weight-load and adjustment leeway. Allow for some extra inches to adjust the panels perfectly within the chosen area.
Proceed to prep the floor area by clearing any existing flooring and debris. It is crucial that the floor is even, level, and free from any structural flaws that could compromise the divider’s stability.
There are several alternatives for attaching the partition to the ceiling, the most common of which involves using masonry screws that go through the upper channel of the divider into the ceiling. For an extra secure fit, use adhesive materials like caulk or plumber’s putty.
Lastly, secure the base plate to the floor using screws, or a combination of adhesive and screws. Insert additional materials like foam boards for added support if there’s a notable gap.
In Conclusion
Metal room dividers offer a modern, cost-effective, and aesthetically pleasing way to create different zones in any given room. Depending on your preference and needs, you can opt for either a track or panel system, a portable stand-alone unit, or a more permanent wall or ceiling-mounted partition. Each installation method is relatively easy to execute, resulting in an impressively functional and visually appealing space.