6 Helpful Tips on Installing Stainless Steel Wall Niche: A Step-by-Step Guide
Table of Contents
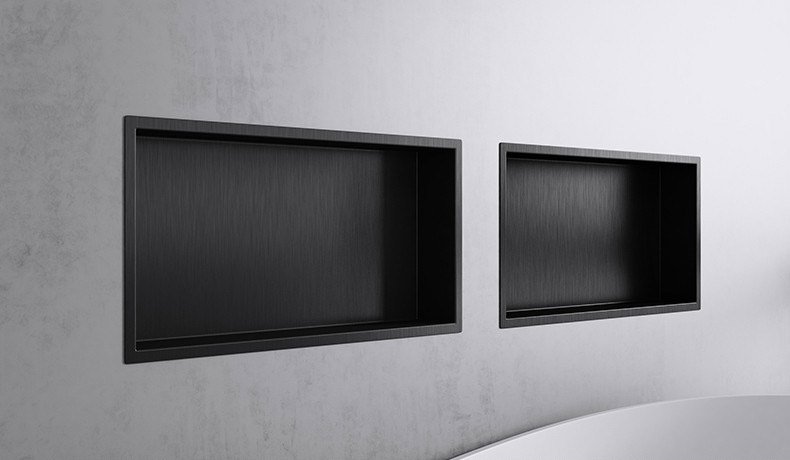
Stainless steel wall-mounted niches are becoming increasingly popular in residential and commercial settings such as bathrooms and kitchens. They are great for adding a modern and sleek touch to an otherwise plain wall, while also providing practical storage and organization for toiletries and other small items.
Materials & Tools
Before installing a stainless steel wall niche, you will need the following materials and tools:
Materials:
Stainless steel wall niche
Screws
Wall Anchors
Construction adhesive
Painter’s tape
Silicone adhesive
Tools:
Measuring tape
Level
Pencil
Drill
Saw (if necessary to modify size of the opening in the wall)
Screwdriver
Caulk gun
It is important to make sure that you have all the materials and tools listed above before starting the installation process. This will ensure that the process goes smoothly and that the finished product meets your expectations. Also, be sure to follow the manufacturer’s instructions when installing the stainless steel wall niche to ensure that it is installed correctly and safely.
Thing to Consider When Installing Stainless Steel Wall Niche
There are several vital factors that you need to consider beforehand to ensure that your niche is secure, functional, and aesthetically pleasing. Here’s a comprehensive guide on what to consider when installing a stainless steel wall niche.
Location
The first thing to consider when putting a stainless steel wall niche is the location. You need to choose a suitable spot for the niche that is easily accessible, convenient, and functional. Typically, people install the niche in the center of the wall or near the showerhead. You also need to take into consideration the weights and sizes of the items you want to store in the niche. For instance, if you plan to store large shampoo bottles, your niche needs to be in a location that can accommodate their size and weight.
Size
The size of the niche is non-negotiable. You have to measure the dimensions of the niche to ensure that it fits perfectly on the wall and complements the space. Take into consideration the thickness of the wall to determine the ideal depth of the niche. If the wall is thick or has an intricate design, you may need to adjust the size of the opening to ensure that the stainless steel wall niche fits seamlessly.
Wall Material
The wall on which the stainless steel wall niche will be installed must be strong enough to support the weight of the niche and its contents. If you’re unsure about your wall strength, consult with a contractor or use a stud finder to locate the studs in your wall. Once you’ve found the studs, mark their location on the wall so that you can center the niche between them.
Cutting and Filling
Depending on the design of your wall or the location of the pipes or wiring, you may need to cut into the wall to create space for the niche. Cutting into the wall can be challenging and risky, but with the right tools and safety equipment, you should be fine.
It’s best to make the cut after marking the dimensions of the niche to avoid errors. Use a rotary cutter, jigsaw, or reciprocating saw to make the cuts. Once you have made the cut, ensure that you fill any gaps or cracks created with spackle before installing the niche.
Water Resistance
Another thing to consider when installing a stainless steel wall niche is water resistance. Bathrooms and kitchens are wet environments, and the niche should be waterproofed to prevent moisture from penetrating the wall. Typically, a membrane or waterproofing solution is applied to the back of the niche before installation to ensure water resistance.
Installation Method
There are several methods of installing a stainless steel wall niche. Some options include cutting a hole in the wall and attaching the niche to the studs, using adhesive to attach the niche to the wall, or using a mounting bracket to secure the niche to the wall. Each method has its advantages and disadvantages, so it’s essential to consider the options and choose the one that works best for your situation.
Finishing Touches
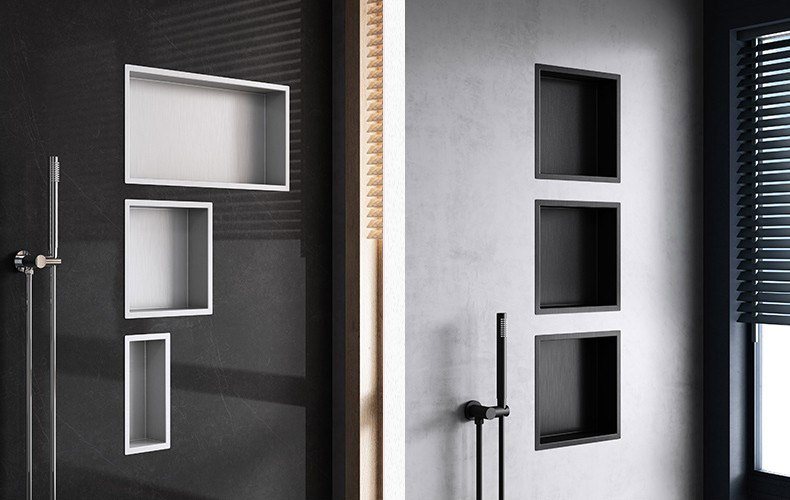
Once your stainless steel wall niche is installed, you can add finishing touches to enhance its appearance and functionality. For example, consider adding lighting or a mirror to the niche to make it easier to see the contents inside. You might also consider adding shelving or dividers to create separate compartments within the niche.
Some Tips to Guide You Through the Process Step-by-step
Step 1: Determine the Location
The first step is to determine where you want to install your stainless steel wall-mounted niche. Consider the size and style of the niche, as well as the placement of plumbing and electrical lines behind the wall.
Measure and mark the area where you want to install the stainless steel wall-mounted niche. Use a level to ensure that the niche will be evenly placed. What’s more, avoid installing the niche over any of these lines.
Step 2: Prepare the Wall
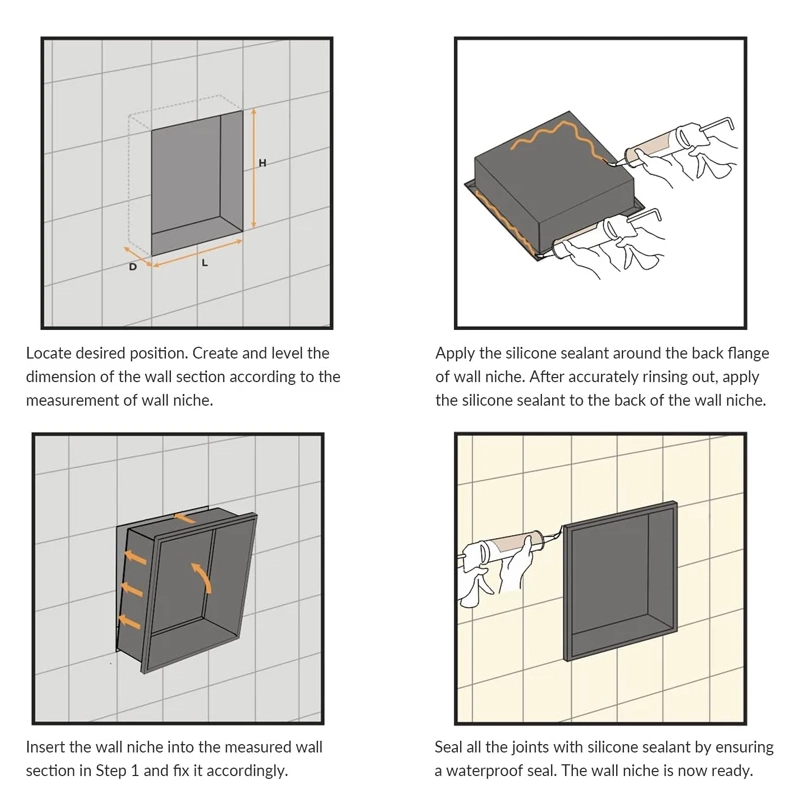
Before installing the niche, you will need to prepare the wall by measuring and marking the area where you want to install it. Be sure to use a level to ensure that your niche will be straight and even. Once you’ve marked the area, cut out the drywall using a drywall saw or utility knife.
Step 3: Install a Backer Board
To ensure that your niche is securely anchored to the wall, you will need to install a backer board. This is a piece of wood or cement board that is installed behind the drywall in the area where the niche will be placed. Use screws to attach the backer board to the framing studs in the wall.
Step 4: Install the Niche
Once the backer board is installed, it’s time to install the niche. Apply a generous amount of silicone adhesive to the back of the niche and press it firmly into place on the wall. Use a level to ensure that it is straight and even.
Step 5: Seal the Edges
Once the niche is installed, seal the edges with silicone caulk to ensure a water-tight seal. Use a caulk gun to apply caulk to the edges of the niche and smooth it out with a caulk smoothing tool. Wipe away any excess caulk with a damp cloth.
Step 6: Finish the Niche
Once the caulk is dry, paint or finish the niche to match the surrounding walls. Use a paint brush or spray paint to apply a finish to the stainless steel niche. Be sure to cover the entire surface of the niche evenly.
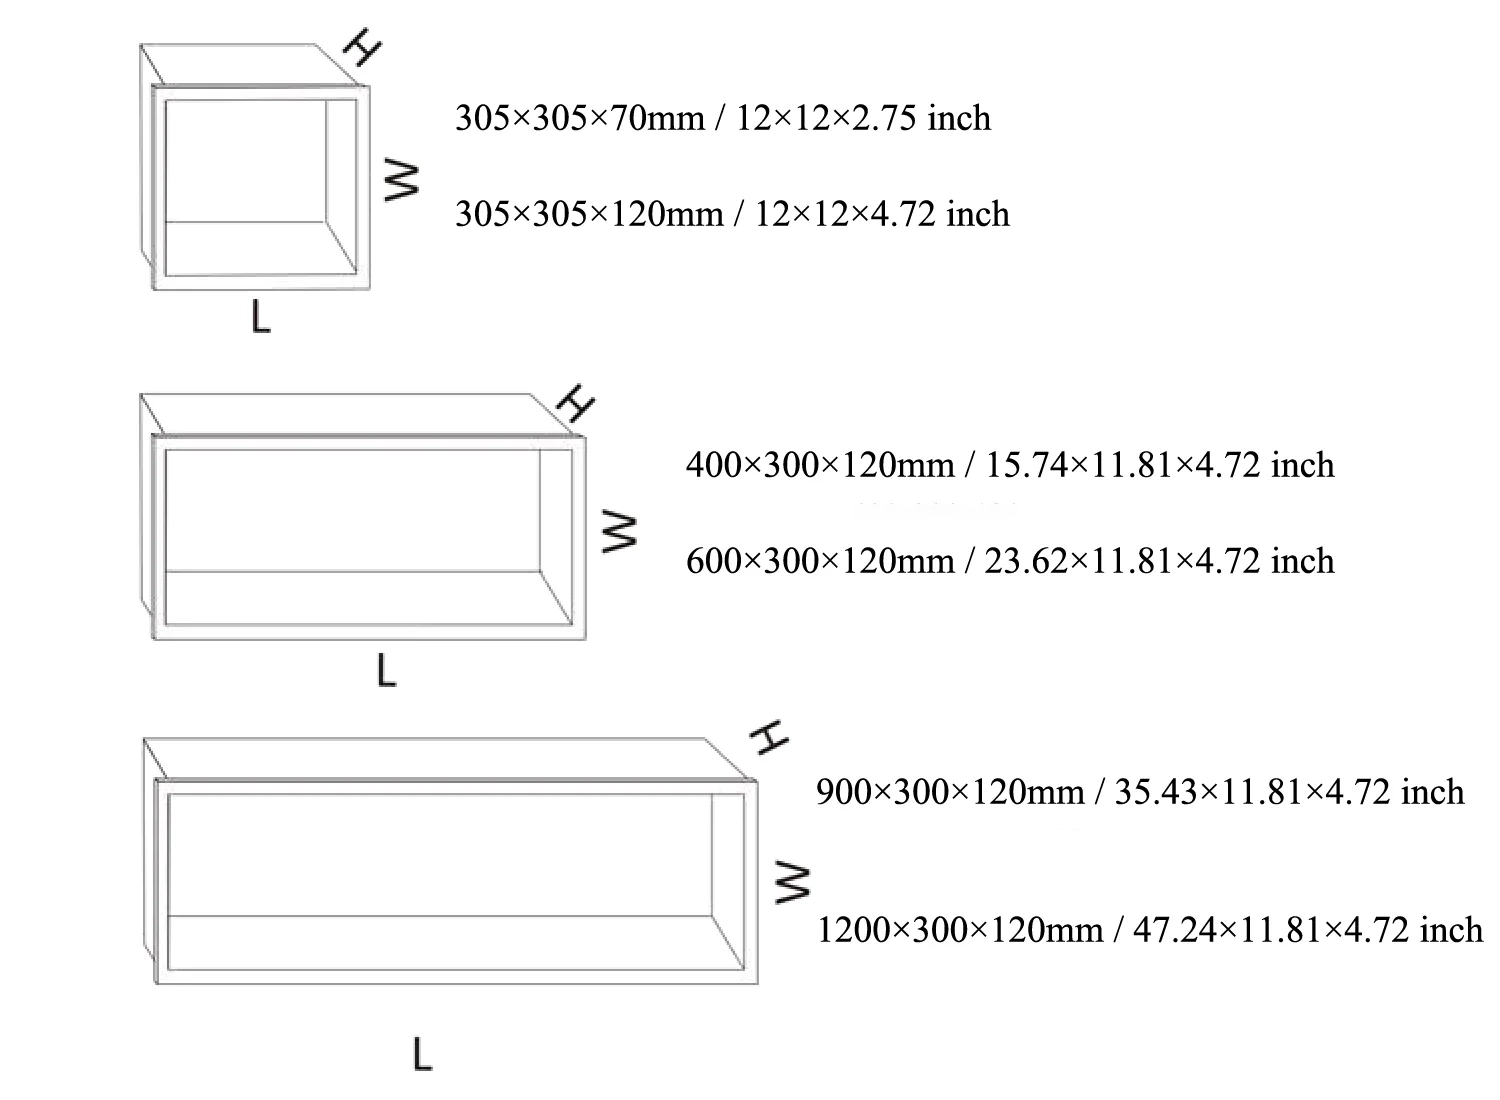
General Size of Stainless Steel Wall Niche
Single layer – 305*305*100mm / 380*380*100mm / 320*520*100mm
Double layer – 305*610*100mm
Three layer – 910*200*100mm
In Conclusion
Installing a stainless steel wall-mounted niche can be a great way to add both style and functionality to your space. By following these simple steps, you can easily install a stainless steel niche that will look great and provide practical storage and organization for years to come. Remember to take your time and use the proper materials to ensure a secure and durable installation.